
A leaking garbage disposal is either a cheap fix or a replacement, and the spot where the water shows up tells you which. Water at the sink flange (top) or at a side connection is usually a loose fitting, a worn gasket or a bad hose clamp. Water coming from the bottom of the unit means the internal seal has failed, and the disposal has to be replaced. Below is how to shut things down safely, pin down the exact source, and decide what to do next.
TL;DR
- Switch off power at the breaker, empty the cabinet and stop using the sink and dishwasher until you know where the water comes from.
- Dry everything, then run a simple dry test with paper towels to find the wet connection: top flange, side discharge pipe, dishwasher hose or the bottom housing.
- Top and side leaks are often fixable by tightening or resealing. A leak from the bottom housing means replacement; epoxy and caulk do not hold.
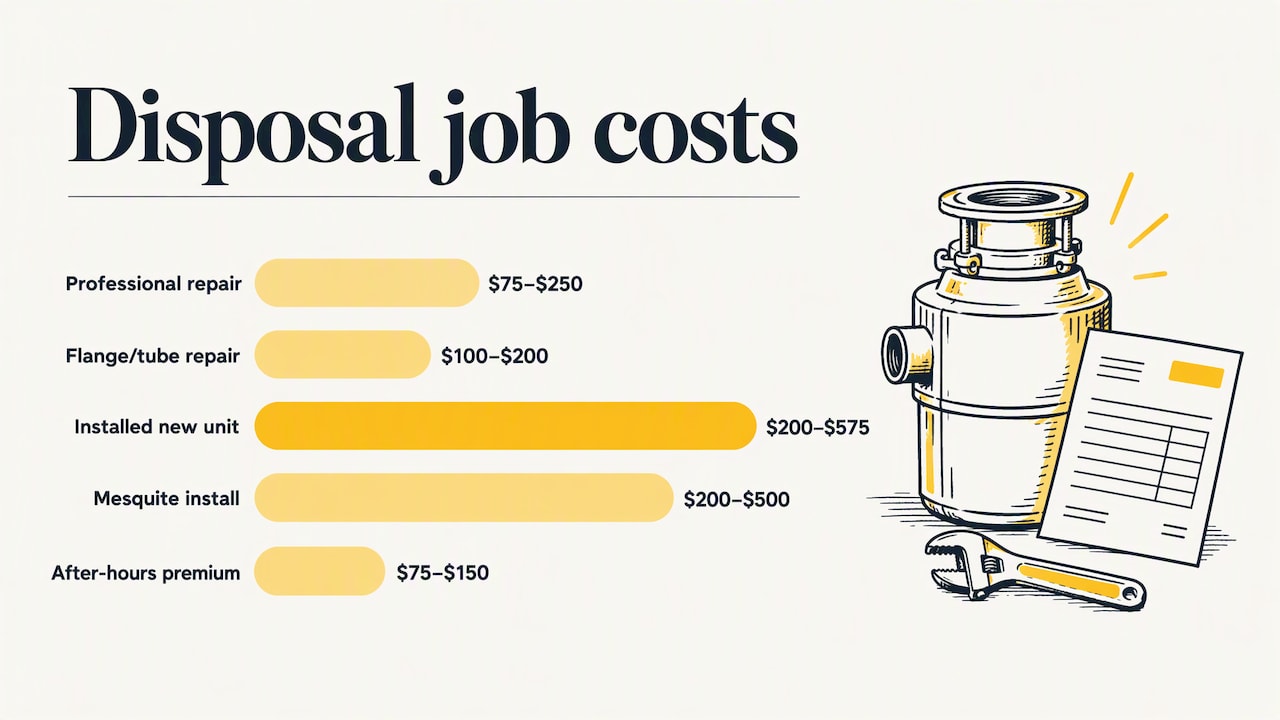
- Repairs commonly run $100 to $200 and a professionally installed replacement $200 to $575, according to a 2026 pricing guide.
- If the cabinet is soaked, the water keeps coming or you can’t find the source, call a licensed plumber.
Table of Contents
- First, make it safe
- Find where the water is really coming from
- What each leak location means
- Repair or replace?
- What it costs
- Fixing a top or side leak yourself
- Why a handyman or DIY install can cost you the warranty
- Our perspective: what we see under Richmond sinks
- When to call a plumber
- Book a leak diagnosis in Richmond
- How to keep a disposal from leaking again
- FAQ
- Sources
First, make it safe
Water and electricity share a cramped space under your sink, so start there.
- Cut the power. Unplug the disposal, or switch off the breaker that feeds it. HouseWise puts it bluntly: confirm power is off before your hands go near the unit. Don’t rely on the wall switch alone.
- Clear the cabinet. Pull out cleaning supplies and trash bags, and put a bucket or shallow pan under the disposal.
- Mop up standing water. Wet particleboard swells and grows mold quickly, so dry the cabinet floor and the back wall.
- Pause the sink and the dishwasher. The dishwasher drains through the disposal. Running either one while you don’t know the source just adds more water to the cabinet.
One more electrical point. Many disposals are controlled by a countertop switch accessory. In 2018 the U.S. Consumer Product Safety Commission announced a recall of InSinkErator SinkTop switches because water can get into the power module and create a fire hazard. If you have one of those switches and your disposal leaks, check that recall notice.
Find where the water is really coming from
Most people see a puddle and blame the disposal body. Often the disposal is fine and a connection near it is the culprit. Plumbers see this all the time: an aged sink flange gasket, a dishwasher hose connection or a loose P-trap joint gets blamed on the unit.
The manufacturer’s own troubleshooting page recommends a dry test, and it works well:
- Dry the disposal, the pipes and the cabinet completely.
- Wrap or place dry paper towels around the sink flange, the discharge elbow and the dishwasher inlet.
- Plug the sink and fill it with water, then watch which towel gets wet first. InSinkerator’s support page walks through the same approach.
- Pull the plug so the water drains through the disposal, with the unit still powered off, and check the towels again. Some leaks only show under the pressure of draining water.
- If the dishwasher is a suspect, run a short cycle afterward and check the hose connection.
A flashlight and a dry hand running along each joint will find a slow drip faster than your eyes will.
What each leak location means
| Where it leaks | Likely cause | Typical outcome |
|---|---|---|
| Top, under the sink flange | Loose mounting assembly, dried-out putty or a worn flange gasket | Often fixable by tightening or resealing |
| Side, at the discharge pipe | Loose or cracked drain line connection, bad gasket | Usually fixable with a new gasket or bolts |
| Side or low, at the dishwasher inlet | Loose hose clamp or cracked hose | Replace the clamp or hose |
| Below the unit, at the P-trap | Loose slip nut or worn washer | Tighten or replace the washer |
| Directly from the bottom housing | Failed internal seal or cracked body | Replace the disposal |
Leaks at the top: the sink flange and mounting assembly
If water appears around the ring where the disposal hangs from the sink, the mounting assembly is the first suspect. Common causes are a loose locking ring, loose mounting screws, or an old gasket and plumber’s putty seal under the flange that has dried out. Tightening the mounting screws evenly sometimes stops the drip. If it doesn’t, the unit has to come down, the flange has to be cleaned of old putty, and it has to be reset with fresh sealant and a good gasket. That is a real job: the disposal is heavy and awkward to hold overhead while you work, so many homeowners hand it off.
Leaks at the side: discharge pipe and dishwasher hose
Two lines connect to the side of most disposals: the drain pipe that carries water out, and the dishwasher hose. A loose connection on either one is one of the most common reasons for a side leak. Snug the hose clamp and the discharge flange bolts, but don’t overtighten, because a cracked plastic fitting turns a drip into a bigger problem. If a gasket looks flattened, cracked or gummy, replace it rather than reusing it.
Leaks at the P-trap and drain pipes
Water that seems to be coming from “under the disposal” may be dripping from the trap below. Slip nuts work loose over time and washers wear out. Hand-tighten the nuts, wipe everything dry and test again. If the pipe itself is corroded or cracked, replace that section.
Leaks at the bottom: the one you can’t patch
Water dripping from the underside of the unit means the internal seal between the motor housing and the grinding chamber has failed. According to the 2026 pricing guide, that seal is made at the factory and isn’t field-serviceable. The same guide notes that homeowners often reach for epoxy or caulk, and it doesn’t work, because the leak is inside the unit. The honest answer is a new disposal.
That is the one scenario where replacement is the standard path. Leaks at the flange or the discharge connection often come down to a gasket or sealant, and those can save the unit.
Repair or replace?
Use these questions to decide.
- Where is the leak? Bottom housing means replace. Top or side often means repair.
- How old is the unit? A well-maintained disposal typically lasts five to ten years, according to Family Handyman. A Texas plumbing company’s price guide for Mesquite notes that replacement is often cheaper than repair on units seven years or older. That’s a different city, but the logic carries over to our area.
- Does it also jam, hum or smell? A unit with several problems at once is usually near the end of its life.
- Is the cabinet damaged? Water damage repair costs more than the disposal. Fix the leak first.
What it costs
Prices vary with horsepower, brand and local labor. For reference:
| Job | Typical cost | Source |
|---|---|---|
| Professional disposal repair (national range) | $75 to $250 | Plumbing Price Guide, 2026 |
| Common leak repair at the flange or discharge tube | $100 to $200 | Plumbing Price Guide, 2026 |
| New unit, professionally installed | $200 to $575 | Plumbing Price Guide, 2026 |
| Disposal install, Mesquite, TX | $200 to $500 | Mesquite plumber price guide, 2026 |
The same national guide says after-hours or weekend calls typically add a premium of $75 to $150 to the standard labor rate. A leak that starts Friday night can cost more to fix at once than one that can wait for Monday, as long as you’ve shut off power and water use and the cabinet is contained.
These are third-party figures, not our quotes. We don’t publish a flat price for disposal work, because the job depends on what we find under your sink.
Fixing a top or side leak yourself
If the dry test points to a loose connection and you’re comfortable with basic tools, this is what the job looks like.
- Power off, bucket in place.
- Tighten the flange mounting screws evenly, a quarter turn at a time, working around the ring.
- Snug the dishwasher hose clamp with a screwdriver.
- Check the discharge pipe bolts and the gasket behind them. Swap the gasket if it’s worn.
- Hand-tighten the P-trap slip nuts.
- Dry everything, put fresh paper towels down and repeat the dry test with the sink full.
If a joint that you’ve tightened still drips, stop. Cranking harder on a plastic fitting cracks it. Resetting a flange means disconnecting the unit, which is when a second pair of hands, or a plumber, makes sense.
Sometimes a leak is not at the disposal at all but in the supply or drain lines behind the cabinet wall. Specialists in other markets use pressure testing to find that kind of hidden leak; this leak detection and pressure testing overview from a Singapore contractor shows how the method works on pipes. If your cabinet stays damp after the disposal tests dry, hidden plumbing is the next place to look.
Why a handyman or DIY install can cost you the warranty
Before you reinstall or replace, check your warranty. The pricing guide reports that major brands such as InSinkErator and Moen require installation by a licensed plumber to keep the full parts and labor coverage, and that self-installs or handyman installs can void the labor warranty. Read the terms for your model. Warranties also commonly exclude misuse and improper installation, as in Waste King’s limited warranty, which lists accidents, abuse, misuse and negligence among the exclusions.
Our perspective: what we see under Richmond sinks
We’re a locally owned HVAC and plumbing company in Richmond, and kitchen leaks are a normal part of the plumbing calls we take. Here is how we think about a leaking disposal.
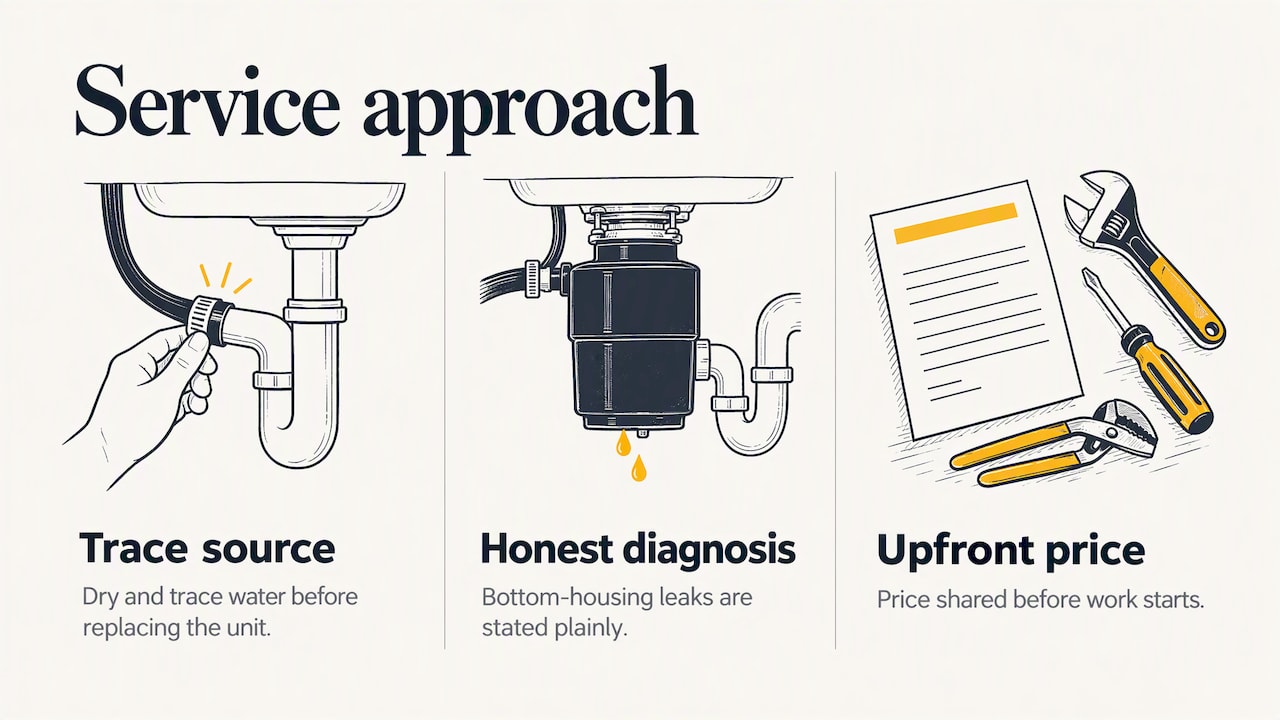
First, we don’t assume the disposal is the problem. We dry everything and trace the water to its source, because a loose hose clamp should cost you a few minutes, not a new unit. Second, when the leak is truly in the bottom housing, we tell you so plainly. We won’t sell you a sealant patch that fails in a week. Third, we put the price in front of you before work starts. Transparent pricing and clear communication are how we want every visit to go, whether it’s a disposal, a water heater or an AC repair.
One piece of practical advice: if you smell sour water under the sink, see swollen cabinet panels or find rust at the base of the unit, treat that as a slow leak that has been running a while. The sooner it’s stopped, the less cabinet you replace.
— Wally
When to call a plumber
Call a licensed plumber if:
- The leak is from the bottom housing and you want the replacement done right and kept under warranty.
- You’ve tightened everything and the dry test still shows water.
- The cabinet floor is soaked, swollen or moldy.
- Water is near electrical connections, or you can’t be sure the power is off.
- You can’t tell whether the water is from the disposal, the dishwasher line or a pipe in the wall.
- The leak is active and you can’t contain it with a bucket. If the water is coming faster than that, shut off the supply valve and read our guide to what to do about a burst pipe or water leak in Richmond.
When picking who to call, a licensed local plumber you contact directly usually beats a lead-generation site. According to the pricing guide, those sites often forward your details to four to six contractors at once, and the result is a flood of calls with no guarantee of better pricing or quality.
Book a leak diagnosis in Richmond
If you want a licensed plumber to find the source and give you a clear price before any work begins, our team serves Richmond and nearby areas. See our local plumber page or, if water is actively running, our 24/7 emergency plumbing service. Our technicians are licensed, and we explain what we find and what it costs before we start.
While we’re out, we can also look at your water heater, which sits on the same plumbing system and is another common source of leaks. Our guide explains water heater leaks from the bottom versus the top.
How to keep a disposal from leaking again
- Run cold water while grinding and for several seconds afterward, so debris clears the trap.
- Avoid grease, fibrous scraps and bones. They load the unit and the drain.
- Clean it regularly. Municipal home maintenance guides, like this one from the City of Shasta Lake, include grinding ice cubes and flushing as part of a monthly checklist.
- Check under the sink every few months. A quick look with a flashlight and a dry paper towel catches small drips early.
- Don’t force a jammed unit. Straining a motor and seals can start a leak.
- Plan for replacement around the seven to ten year mark rather than waiting for the failure.
FAQ
What should I do if my garbage disposal is leaking from the bottom?
Turn off power at the breaker, put a bucket under it and stop using the sink. A bottom leak means the internal seal has failed, and it can’t be repaired in the field. Plan on replacing the unit, ideally with a licensed plumber so the warranty stays intact.
Can I use my sink or dishwasher if the disposal is leaking?
It’s best not to. Both drain through the disposal, so every use sends more water into the cabinet. Use another sink until you’ve found and fixed the source.
Can I seal a leaking disposal with epoxy or caulk?
Not a bottom-housing leak. The water is escaping from an internal seal, so sealant on the outside won’t hold. Sealant and gaskets are the right fix only for the sink flange and certain connections.
How long does a garbage disposal last?
A well-maintained unit typically lasts five to ten years, according to Family Handyman. Heavy use, grease and jams shorten that, and a leak in an older unit is often a sign it’s time to replace it.
Sources
- Garbage Disposal Repair Cost: 2026 Pricing Guide
- Plumber Cost in Mesquite, TX: 2026 Prices & Rates
- InSinkErator: Garbage Disposal Leaking
- HouseWise: Garbage Disposal Leak from the Bottom, Top, or Side
- Family Handyman: Why Is My Garbage Disposal Leaking From the Bottom?
- CPSC: InSinkErator SinkTop Switch recall
- Waste King Garbage Disposal Limited Warranty
- City of Shasta Lake: Home Maintenance Checklist for Every Season