
Temper Mechanical Air and Heat LLC

Author name: Alphalead seoteam

Smell Gas Near Your Water Heater? Do This Immediately
Uncategorized

Smell Gas Near Your Water Heater? Do This Immediately

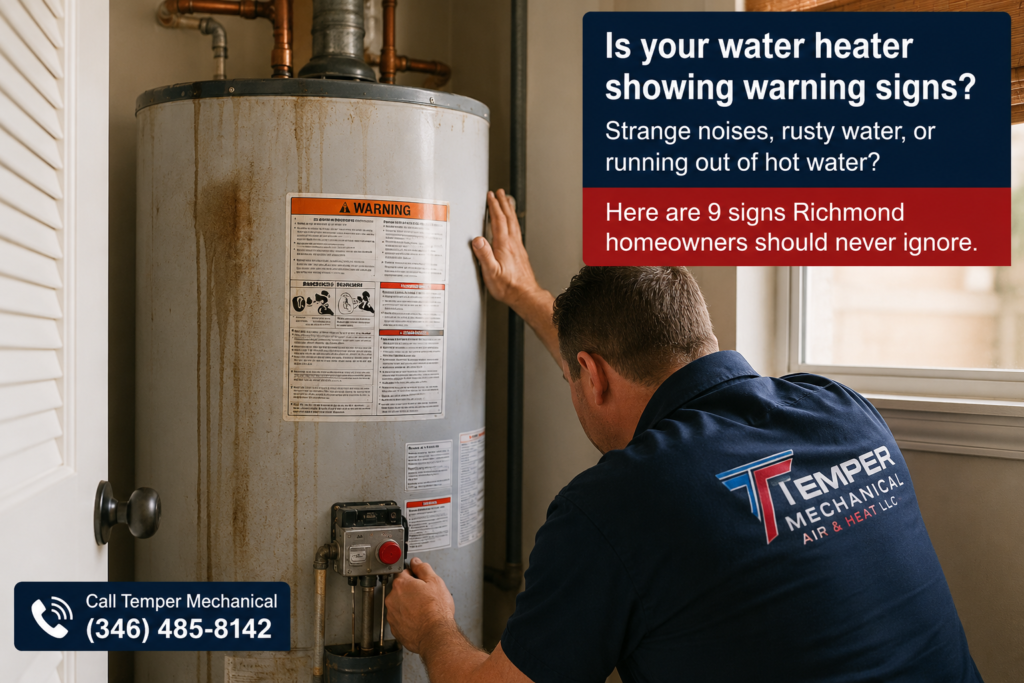
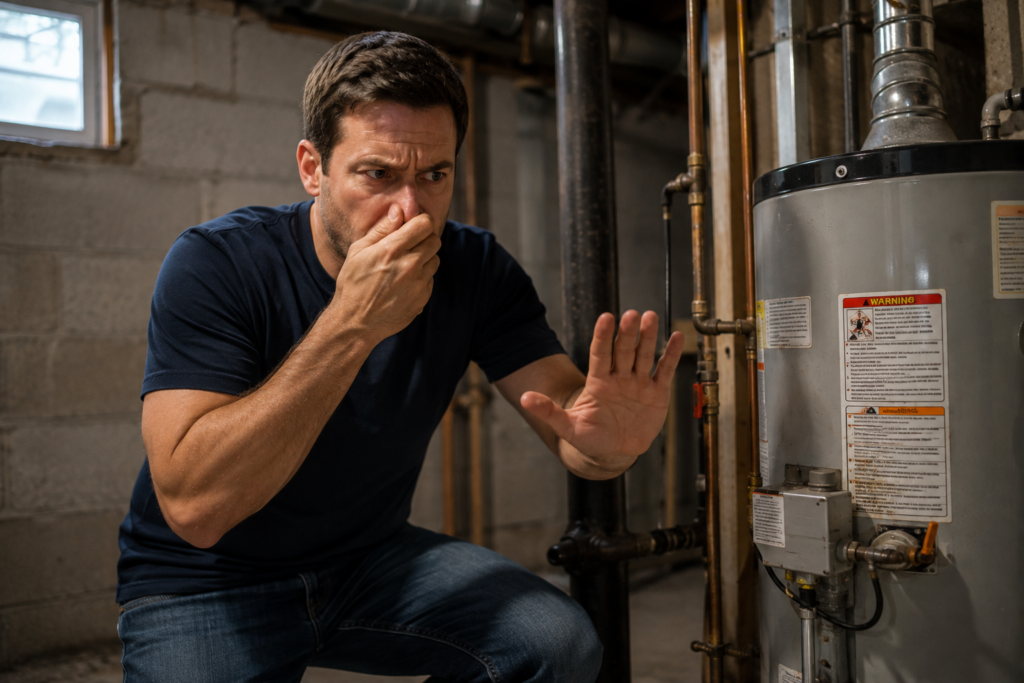
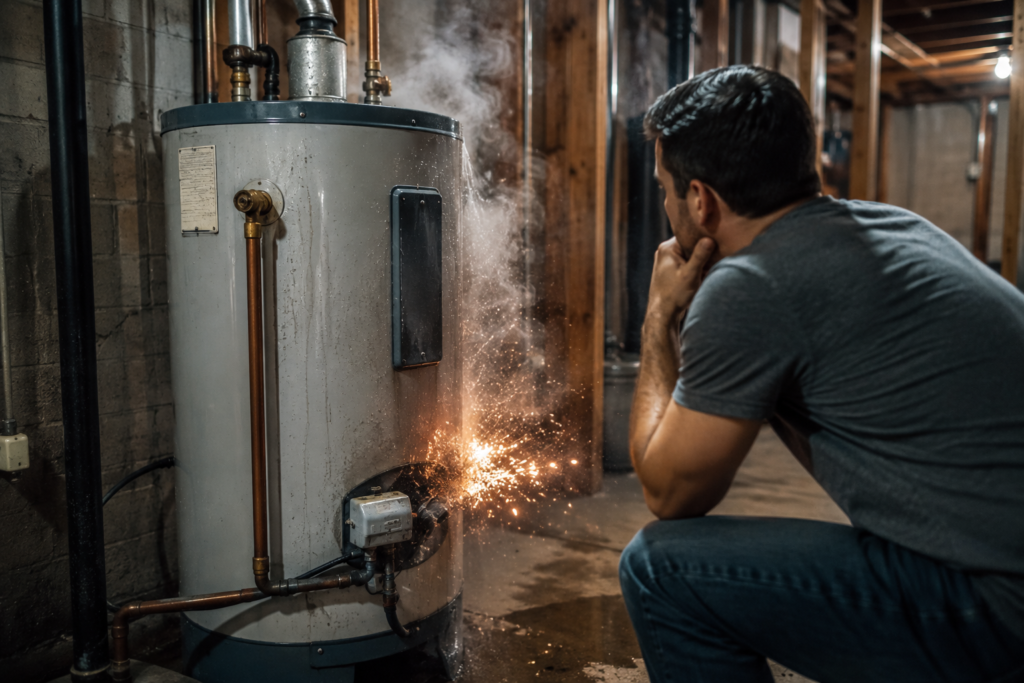
If you are reading this because you smell gas right now, stop reading and act first. Leave your home immediately, do not touch any light switches or electrical devices on your way out, and once you are safely outside and away from the house, call your gas utility provider’s emergency line. Their number is usually on your monthly bill or printed on your meter. If you cannot find it quickly, call 911. Once you and your family are safe outside, come back to this guide if you want to understand exactly what to do next and why. If you are here because you want to know what to do in case this happens, or you noticed a faint smell and are not sure if it is serious, keep reading. This information could genuinely matter one day. Why Gas Water Heaters Have a Smell Built In Natural gas and propane are actually odorless in their raw form. Utility companies add a chemical called mercaptan specifically because it gives gas a distinct, unpleasant smell often described as similar to rotten eggs or sulfur. This is intentional and it is one of the most important safety features in your entire home. Without that added odor, a gas leak could go completely undetected until it became a serious hazard. This means if you smell that sulfur like odor near your water heater, your body is picking up on a warning system that was deliberately designed to get your attention. It is not something to second guess or wait out. What To Do the Moment You Smell Gas Do not touch any switches, including light switches, on your way out. Flipping a switch, even to turn something off, can create a small electrical spark. In an environment with a gas leak, that spark is a genuine ignition risk. Leave lights, fans, and any electrical devices exactly as they are. Do not light a match, use a lighter, or strike anything to see better. This should go without saying, but in a moment of panic people sometimes act on instinct without thinking it through. Any open flame near a gas leak is dangerous. Do not use your phone inside the house. Cell phones and cordless phones can, in rare cases, generate a small spark. Wait until you are outside and a safe distance from the house before making any calls. Leave doors and windows as they are on your way out. Do not stop to open windows for ventilation. Getting everyone out safely and quickly matters more than trying to air out the house on your way through it. Get everyone, including pets, out of the home immediately. Move to a safe distance, ideally across the street or well away from the structure, not just onto the porch or driveway. Do not go back inside for any reason. Not for a phone charger, not for a pet you think might still be inside, not for anything. Once you are out, stay out until a professional confirms it is safe to return. Call your gas provider’s emergency line from outside the home. Most gas utility companies operate a 24 hour emergency response line for exactly this situation. If you are in the Richmond TX or Fort Bend County area and are unsure of your provider’s emergency contact, calling 911 will connect you with emergency services who can help coordinate a response. Do not attempt to locate or fix the leak yourself. Even if you feel confident about where the smell is strongest, do not try to inspect, tighten, or adjust any gas connections yourself while a leak is active. Leave this entirely to trained professionals with the right equipment. What Happens After You Call When you report a suspected gas leak, your utility provider typically dispatches a technician to your home quickly, often within the hour, specifically because of how seriously these calls are treated. They will use specialized gas detection equipment to locate the source of the leak, which may be coming from your water heater itself, a connection fitting, or the gas line leading to the unit. In many cases, the gas company will shut off service to your home entirely until the leak is identified and repaired. This is a safety measure, not a punishment, and it means you may be without gas service, including hot water and potentially cooking gas, until the issue is resolved. Once the utility company has confirmed the source and either repaired the immediate hazard or shut off gas flow safely, this is when a licensed HVAC or plumbing technician comes in to repair or replace the faulty component on your water heater itself. What Actually Causes a Gas Smell Near a Water Heater Understanding the common causes helps you know what a technician is likely to find, though this should never replace calling for help when you smell gas. Diagnosis and repair should always be handled by a professional. A loose or failing gas connection fitting. Over time, the fittings connecting your water heater to the gas supply line can loosen slightly due to vibration or general wear. Even a small gap at a connection point can allow gas to escape. A cracked or deteriorated gas supply line. Older flexible gas lines can develop small cracks or weak points over years of use, particularly in units that have never had a professional inspection. A malfunctioning gas control valve. The valve responsible for regulating gas flow to the burner and pilot can sometimes fail in a way that allows gas to leak rather than shutting off cleanly, particularly in older units. Pilot light issues combined with gas buildup. If a pilot light repeatedly fails to stay lit and gas continues to flow briefly before the safety mechanism shuts it off, small amounts of unburned gas can accumulate in the area around the unit, creating a noticeable smell even without an active mechanical leak. Incomplete combustion. In rare cases, a water heater that is not burning gas efficiently can

Water Heater Tripping the Breaker Repeatedly? Here's What's Actually Causing It
Uncategorized

Water Heater Tripping the Breaker Repeatedly? Here’s What’s Actually Causing It

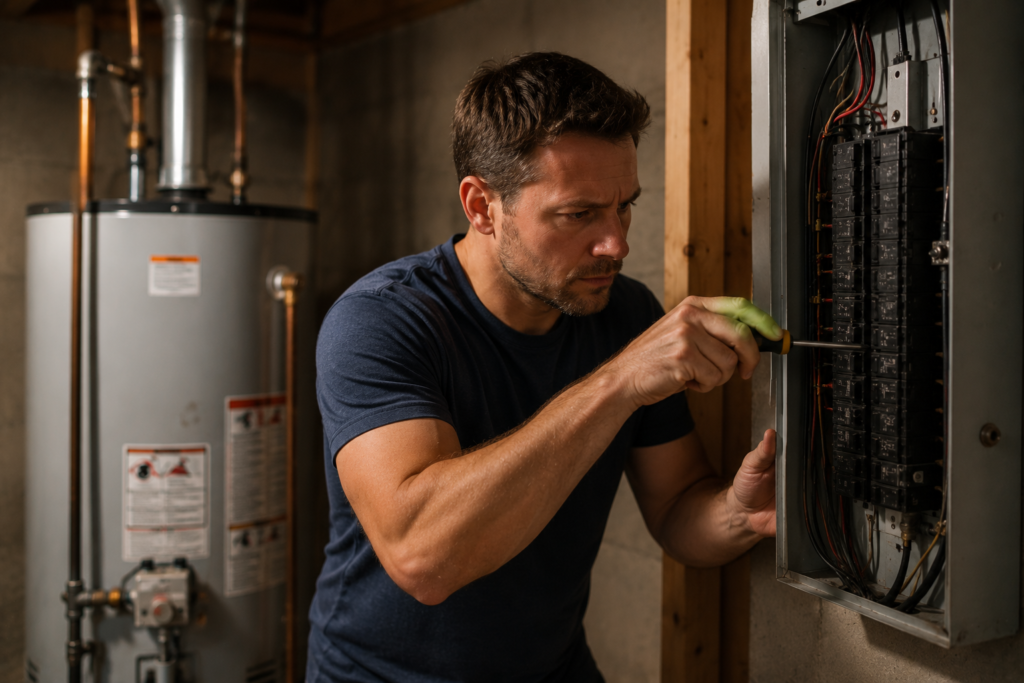
You reset the breaker, walk away, and a few minutes later it trips again. Or maybe it holds for a day and then trips again the next morning. Either way, you are stuck in a frustrating cycle, and deep down you already suspect this is not something you can just keep resetting forever. You are right to think that. A breaker that trips once might be a fluke. A breaker that trips repeatedly is your electrical panel doing exactly what it is designed to do, protecting your home from a real problem happening inside your water heater. The breaker is not the issue. It is the messenger. Here is what is actually going on, what you can safely check yourself, and when this becomes something that needs a licensed technician rather than another reset. Why a Breaker Trips in the First Place Before getting into causes, it helps to understand what a breaker is actually responding to. A circuit breaker trips when it detects either a current overload, meaning more electricity is flowing through the circuit than it is rated to handle, or a short circuit, meaning electricity is finding an unintended path, often through a failing component or damaged wiring. Your electric water heater runs on a dedicated 240 volt circuit, and that circuit is sized specifically for the heater’s normal electrical draw. When something inside the unit starts pulling more current than it should, or when electricity starts leaking somewhere it should not be, the breaker trips as a safety measure to prevent overheating, electrical fire risk, or damage to your home’s wiring. This means every time your breaker trips, something specific is happening inside that water heater. The five causes below cover nearly every situation we encounter. Cause 1: A Failing Heating Element This is the most common reason we find behind a repeatedly tripping water heater breaker, and it makes sense once you understand how these elements work. Most electric water heaters have two heating elements, an upper element and a lower element, each controlled by its own thermostat. These elements sit directly in the water inside the tank and heat it through electrical resistance. Over years of use, elements gradually degrade. Mineral deposits build up around them, the metal casing can develop small cracks, and eventually the element can develop what is called a ground fault, where electricity leaks from the element into the water or the tank itself instead of staying contained within its intended path. When this happens, the breaker senses that abnormal current and trips to protect the circuit. This is often the exact mechanism behind a breaker that trips consistently, sometimes within minutes of being reset. How to know if this is your problem. If the breaker trips shortly after being reset, especially if it happens more consistently when the water heater is actively heating rather than sitting idle, a failing element is a strong possibility. You may also notice your hot water has become inconsistent or lukewarm in the weeks leading up to this, since a struggling element often shows performance issues before it fails completely. What needs to happen. A failed element needs to be tested with a multimeter to confirm the ground fault and then replaced. This involves shutting off power to the unit, draining part of the tank, and safely working with electrical components submerged in water. This is squarely a job for a licensed technician, both for safety and to ensure the replacement is installed and sealed correctly. Cause 2: A Faulty Thermostat Each heating element is paired with a thermostat that regulates when the element turns on and off based on water temperature. When a thermostat fails, it can sometimes cause the element to draw power incorrectly or fail to cycle properly, which puts unusual strain on the circuit and can trigger a breaker trip. This cause is sometimes confused with a failing element because the symptoms can look similar from the outside. The real difference typically comes out during testing, where a technician can determine whether the fault lies in the thermostat’s control function or the element’s electrical integrity itself. How to know if this is your problem. If your water temperature has been inconsistent, running too hot at some times and too cool at others, alongside the breaker tripping, a thermostat issue is worth considering as a contributing factor. What needs to happen. Thermostat replacement is a relatively straightforward repair once properly diagnosed, but like element replacement, it requires shutting off power safely and working inside the access panel of the unit. This should be handled by a professional. Cause 3: Loose or Corroded Wiring Connections Over time, the wiring connections inside your water heater’s junction box or at the breaker itself can loosen due to normal vibration, thermal expansion and contraction from repeated heating cycles, or general age. Loose connections create resistance at that connection point, which generates heat and can cause irregular current flow that the breaker interprets as a fault. In homes with older wiring or water heaters that have been in place for many years without any electrical inspection, corrosion at connection points can create a similar effect, particularly in humid environments like garages or utility closets here in Fort Bend County. How to know if this is your problem. This cause is harder to identify without opening the unit, but it becomes more likely if your water heater is older and has never had its electrical connections inspected. A slight burning smell near the electrical panel or discoloration around the wiring connections are signs worth mentioning to a technician if you notice them. What needs to happen. This requires a visual and functional inspection of the wiring connections at the water heater and sometimes at the breaker panel itself. Tightening or repairing these connections is straightforward for a licensed electrician or HVAC technician but should never be attempted without cutting power to the circuit first and understanding what you are looking at. Cause 4: A Bad or

Water Heater Pilot Light Won't Stay Lit? Here Are the 5 Real Causes and How to Fix Each One
Uncategorized

Water Heater Pilot Light Won’t Stay Lit? Here Are the 5 Real Causes and How to Fix Each One

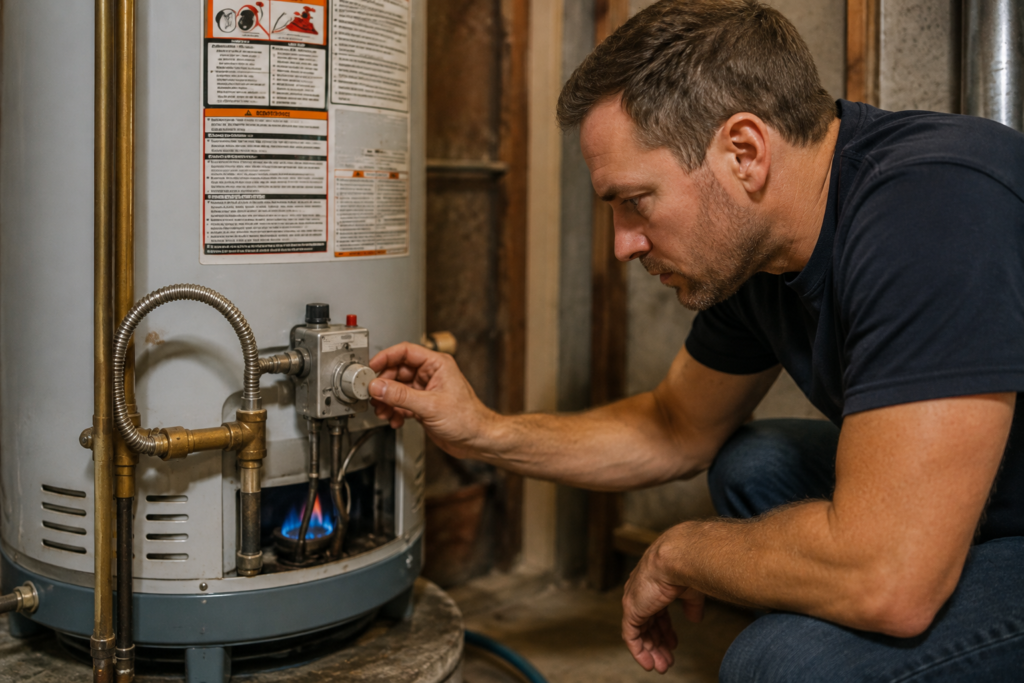
You light the pilot on your gas water heater, hold the button down like the instructions say, count to sixty, let go, and for a moment everything seems fine. Then thirty seconds later, or maybe a few minutes later, it goes out again. You try it a second time. Same result. A third time, just to be sure you are not doing something wrong. Still the same thing. This is one of the most common water heater complaints we hear, especially as the weather cools down and gas water heaters start working harder. The good news is that a pilot light that will not stay lit almost always points to one of five specific causes, and once you know what to check, you can usually figure out exactly what is going on before you ever pick up the phone. Let us walk through each one, starting with the most common. Cause 1: A Failing Thermocouple This is by far the most common reason a pilot light will not stay lit, and it is worth understanding exactly what this small part does and why it matters so much. The thermocouple is a safety sensor positioned directly in the pilot flame. Its entire job is to confirm that the pilot is actually burning. When the thermocouple senses heat from the flame, it sends a small electrical signal that tells the gas valve to stay open and keep supplying fuel to the pilot. If the thermocouple does not sense that heat, it assumes the pilot is out and shuts the gas valve completely. This is a critical safety feature that prevents unburned gas from continuously flowing into your home. Over time, thermocouples wear out. The metal degrades from repeated heating and cooling cycles, and eventually it stops generating a strong enough signal to keep the gas valve open, even when the pilot is burning perfectly fine. When this happens, you can relight the pilot as many times as you want. It will always go out shortly after you release the button because the thermocouple simply cannot hold the valve open on its own anymore. How to know if this is your problem. If your pilot lights easily, burns steadily while you hold the button, and then goes out within seconds to a couple minutes after you let go every single time, a worn thermocouple is the most likely cause. This is especially true if your water heater is more than six or seven years old, since thermocouples typically last that long before needing replacement. What you can do. Thermocouples are inexpensive parts, but replacing one correctly involves working with the gas control valve, disconnecting and reconnecting a gas fitting, and making sure everything is properly sealed and tested afterward. This is a job we recommend leaving to a licensed technician. It is a quick, affordable repair when done professionally, and it eliminates the guesswork of whether the replacement was installed correctly and safely. Cause 2: A Dirty or Clogged Pilot Tube The pilot tube is the small tube that delivers gas specifically to the pilot flame. Over months and years, this tube can accumulate dust, soot, or even small amounts of corrosion, particularly if your water heater sits in a garage or utility closet where dust settles easily. When the pilot tube becomes partially clogged, the flame it produces gets smaller and weaker. A weak flame may not generate enough heat to properly activate the thermocouple, even if the thermocouple itself is in good condition. This creates a situation that looks identical to a thermocouple failure from the outside, but the actual cause is a restricted gas flow rather than a failing sensor. How to know if this is your problem. Look closely at your pilot flame the next time you light it. A healthy pilot flame should be a steady blue flame, roughly half an inch to an inch tall, with a small yellow tip. If your flame looks small, weak, flickering, or mostly yellow instead of blue, restricted gas flow through a dirty pilot tube is a likely culprit. What you can do. Cleaning a pilot tube requires disconnecting it carefully and clearing the opening, typically with a fine wire or specialized cleaning tool. Because this involves working directly with a gas line component, we recommend having a technician handle this rather than attempting it yourself. It is a fast fix once diagnosed correctly. Cause 3: A Draft Affecting the Pilot Flame Sometimes the problem has nothing to do with the water heater itself and everything to do with airflow around it. Water heaters are often installed in garages, closets, or utility spaces that are not perfectly sealed from outside air. A draft, even a subtle one you cannot feel standing in the room, can be enough to disturb a small pilot flame and blow it out repeatedly. This becomes more noticeable during colder months in Richmond TX when homeowners run bathroom exhaust fans, kitchen range hoods, or clothes dryers more frequently. These appliances pull air out of the house, which can create negative pressure that draws air in through gaps around doors, vents, or the water heater closet itself, disturbing the pilot flame in the process. How to know if this is your problem. Pay attention to when the pilot goes out. If it seems to happen more when certain fans or appliances are running, or if you notice a physical draft near the water heater closet door or vents, airflow disruption is worth investigating before assuming a mechanical failure. What you can do. Check the door and any vents on your water heater closet for gaps that could be letting in more air than intended. If your unit has an access panel over the pilot assembly, make sure it is properly seated and closed after any recent servicing. In some cases, sealing gaps around the closet or adjusting nearby ventilation resolves the issue without any repair to the water heater itself. If the draft issue persists and you

Water Heater Making Loud Popping Noises? Here's What It Actually Means
Uncategorized

Water Heater Making Loud Popping Noises? Here’s What It Actually Means

You are standing in your kitchen or walking past the utility closet when you hear it. A sharp popping sound, maybe followed by a few more, coming from inside your water heater. It sounds almost like something is knocking around in there, or worse, like pressure building up somewhere it should not be. Your mind goes straight to the worst case scenario. Is the tank about to burst? Is this dangerous? Should you be evacuating the house right now? Take a breath. In the vast majority of cases, this sound is not a sign of impending disaster. It is your water heater telling you something specific, and once you understand what is actually happening inside that tank, the noise stops being scary and starts being something you can actually address. This guide walks you through exactly what causes that popping sound, why it happens more in this part of Texas than almost anywhere else, and what you should do about it. What That Popping Sound Actually Is The short answer is sediment. The slightly longer answer is worth understanding because it explains why the problem happens and why it tends to get worse over time if it goes unaddressed. Every water heater tank collects mineral deposits over time. As water enters your tank and gets heated, the minerals dissolved in that water, mainly calcium and magnesium, gradually settle at the bottom of the tank. Over months and years, this creates a layer of hardened sediment sitting right above your heating element or burner. Here is where the noise comes from. Water gets trapped underneath and inside pockets of that sediment layer. When your heating element or gas burner fires up, it heats that trapped water rapidly. Trapped water heating up quickly turns to steam, and that steam has to escape through the hardened sediment layer above it. As it pushes through, it creates small bursts and pops, sometimes rapid and sharp, sometimes more like a rolling rumble. Think of it like a covered pot of water starting to boil. Before it reaches a full rolling boil, you hear those small popping and cracking sounds as bubbles form and struggle to rise. That is essentially what is happening inside your tank, just contained within a layer of mineral buildup instead of an open pot. The sound can range from a few subtle pops here and there to a fairly loud and persistent rumbling, almost like gravel shifting inside the tank. The volume and frequency usually correlate directly with how much sediment has accumulated. Why This Happens More Often in Richmond TX and Fort Bend County If you have lived in other parts of the country before moving here, you may notice your water heater seems to develop this problem faster than units you have owned elsewhere. There is a real reason for that. Fort Bend County water is considered hard water, meaning it carries a higher concentration of dissolved minerals, primarily calcium and magnesium, compared to many other regions. Every gallon of water that flows into your tank carries a small amount of these minerals with it. Over time, that adds up significantly faster here than it would in an area with softer water. What might take five or six years to become noticeable in a low mineral content region can show up within two to three years in a home here in Richmond TX. This is not a reflection of a lower quality water heater or poor installation. It is simply a consequence of the water supply itself. This is also why sediment buildup is one of the most common calls we receive from homeowners across Richmond, Sugar Land, Rosenberg, and Pecan Grove. It is not an unusual problem. It is an expected one given the local water conditions, and understanding that helps take some of the anxiety out of hearing those sounds for the first time. Is It Dangerous? Here Is the Honest Answer Most of the time, no. The popping sound itself is not typically an indication of an unsafe or emergency situation. It is a sign of reduced efficiency and increasing internal wear, not an active safety hazard. However, there are a few important distinctions worth understanding. Sediment buildup itself is not dangerous, but it accelerates wear. The sediment layer acts as an insulating barrier between your heating element or burner and the water it is trying to heat. This forces your system to run longer and work harder to reach the same temperature, which increases energy costs and puts additional stress on components that were not designed to work that hard consistently. Prolonged sediment buildup can eventually lead to tank damage. Over years, thick sediment layers can cause localized overheating at the bottom of the tank, which in some cases contributes to premature tank failure or leaks. This is a gradual process, not an immediate one, but it is a real long term consequence of ignoring the problem. A different noise pattern could indicate something more serious. If the popping is accompanied by hissing, whistling, or a sound of water spraying, or if you notice water pooling around the base of your unit, that points toward a different issue entirely, potentially involving a pressure relief valve problem or an active leak. Our guide on water heater leaks and what to do right now covers exactly what those situations mean and how urgently you need to respond. The tank is not going to explode from this sound. This is the fear most people carry when they hear it for the first time, and it is worth addressing directly. Modern water heaters are equipped with a temperature and pressure relief valve specifically designed to release pressure safely if internal conditions ever became genuinely dangerous. Popping from sediment is not the same mechanism as a pressure buildup emergency, and the two should not be confused. What Happens If You Ignore It A lot of homeowners hear the popping, decide it is not urgent since the water still gets

Drain Keeps Clogging? Here Is Why It Keeps Happening and How to Stop It for Good
Uncategorized

Drain Keeps Clogging? Here Is Why It Keeps Happening and How to Stop It for Good

Drain Keeps Clogging? Here Is Why It Keeps Happening and How to Stop It for Good You have poured the drain cleaner down. You have used the plunger. You have even tried that little plastic snake from the hardware store. And two weeks later, the same drain is slow again. If this sounds familiar, you are not dealing with bad luck. You are dealing with a root cause that the quick fixes are not reaching. And until that root cause gets addressed, the clog will keep coming back on the same schedule, costing you time, frustration, and money every single time. This guide is written for homeowners in Richmond TX, Sugar Land, Rosenberg, Pecan Grove, and Fort Bend County who are tired of fighting the same battle over and over. We are going to walk you through exactly why drains keep clogging, what actually works versus what just kicks the problem down the road, and when it is time to call a professional to fix it once and for all. If you are ready to stop dealing with this and just get it sorted, call Temper Mechanical at (346) 485-8142. We offer same-day drain cleaning in Richmond TX throughout Fort Bend County. Otherwise, keep reading. By the end of this guide you will know exactly what is going on in your pipes and what to do about it. Why Your Drain Keeps Clogging — The Real Reason Most homeowners think a clogged drain is a one-time event. Something got stuck, you clear it, problem solved. But when the same drain clogs repeatedly on a cycle of weeks or months, something different is happening. What you cleared with the plunger or the store-bought chemical was the symptom, not the cause. The actual buildup, whether it is a grease coating on the pipe walls, a mass of compacted hair and soap deep in the drain line, mineral scale from Fort Bend County’s hard water narrowing the pipe from the inside, or tree roots that have infiltrated your main sewer line, is still there. You just punched a temporary hole through it big enough for water to flow for a little while. Every time water runs through that compromised section of pipe, it deposits a little more buildup on top of what is already there. The temporary hole closes up. The drain slows. The cycle repeats. The only way to stop this cycle is to either fully clear the obstruction so there is nothing for new material to attach to, or address the underlying condition that is causing buildup to accumulate faster than normal in your specific pipes. The Different Types of Drain Clogs and Where They Come From Not all clogs are created equal. The material causing the blockage determines both how it behaves and what actually removes it. Here is what we typically find in Richmond TX homes. Hair and soap scum in bathroom drains This is the most common clog type in bathroom sinks, bathtub drains, and shower drains. Every shower sends a small amount of hair down the drain. On its own, hair passes through reasonably well. But hair is incredibly good at catching other things. Soap residue, skin cells, toothpaste, shampoo buildup. Over weeks and months this combination forms a dense, matted plug that sits just below the drain cover or deeper in the P-trap. What makes this tricky is that a plunger rarely dislodges it completely. It compresses it. Temporarily. Then it expands back and the drain slows again within days. The right fix is a drain snake that physically grabs and pulls the material out rather than pushing it further down the pipe. This is something you can do yourself with a basic hand snake from any hardware store. Or we can do it in about 15 minutes as part of a service visit. Grease and food waste in kitchen drains Kitchen drain clogs are almost always caused by grease and fat. This is the single most misunderstood drain problem in residential plumbing. Here is what most homeowners do not know. When you pour hot cooking grease down the drain it is liquid and flows freely. It feels like it is going away. But as it travels through your pipes and the water cools, that grease solidifies and coats the inside walls of your drain line. Every time you do this, the layer gets thicker. The pipe diameter gets smaller. Eventually the flow slows to a trickle and then stops. Running hot water while you pour grease down does not help. It moves the grease further down the pipe before it solidifies, which makes the blockage harder to reach when it eventually forms. Food particles, coffee grounds, and starchy materials like pasta and rice compound the problem. They get trapped in the grease coating and add to the buildup. The only real solution is to stop putting grease down the drain entirely. Collect it in a jar, let it solidify, and throw it in the trash. For existing grease buildup, a professional hydro-jetting service, which we will cover shortly, is the most effective way to fully clear a grease-coated drain line. Mineral scale from Fort Bend County’s hard water This is a problem that is more severe in this area than in most parts of Texas and one that many homeowners do not connect to their drain problems. Fort Bend County has some of the hardest water in the state. When hard water flows through your pipes, it leaves behind mineral deposits, primarily calcium and magnesium. Over years these deposits build up on the inside of your pipes in a process called scaling. The pipe does not get fully blocked all at once. Instead the interior diameter slowly narrows, reducing flow and giving every other type of debris a rougher surface to cling to. Mineral scaling explains why some older Richmond TX homes have drains that seem to clog constantly even with careful use. The pipes are simply narrower than they used to be. Chemical

Heater Making Banging, Squealing or Whistling Noises in Richmond TX? Here's Why
Uncategorized

Heater Making Noise? Banging, Squealing, Whistling — What Each Sound Means and What It Costs to Fix

Heater Making Noise? Banging, Squealing, Whistling — What Each Sound Means and What It Costs to Fix Your heater has been running quietly for months. Then one evening you hear it. A bang. A squeal. A whistle that was not there last week. And suddenly you are standing in your hallway wondering whether to ignore it, Google it, or just turn the whole thing off and call someone. Here is the honest truth. Some heating noises are completely harmless and require nothing more than a filter change or a tightened screw. Others are warning signs of something that will get worse and more expensive the longer you ignore it. And a small number of them mean you should stop reading this right now, turn your system off, and call a technician today. This guide tells you which is which. No vague answers. No unnecessary alarm. Just a straight explanation of what each noise typically means for homeowners in Richmond TX, what the urgency level is, and what a fair repair should cost in Fort Bend County. If you are hearing something right now that worries you, call Temper Mechanical at (346) 485-8142. We offer same-day furnace repair in Richmond TX and emergency heater repair throughout Fort Bend County seven days a week. Otherwise, find your noise below and read carefully. Noise 1: Banging or Booming at Startup — Take This One Seriously Of all the noises on this list, a loud bang or boom when your furnace first kicks on is the one that deserves the most immediate attention. This sound is almost always caused by delayed ignition. Here is what that means in plain terms. When your furnace starts a heating cycle, gas flows into the burner chamber and the igniter lights it immediately. That is how it is supposed to work. When something interferes with that process, whether it is a dirty burner, a weak igniter, or a gas pressure issue, the gas continues flowing for a second or two before it finally ignites. By that point there is more gas in the chamber than there should be and when it does light, it ignites with a small explosion. That is the bang you are hearing. Do this once and it is a warning. Do it repeatedly over weeks or months and the repeated pressure bursts can crack your heat exchanger. A cracked heat exchanger is one of the most serious HVAC problems a homeowner can face because it allows combustion gases including carbon monoxide to mix with the air circulating through your home. The size of the bang matters. A small thump might be a minor ignition delay that a burner cleaning can resolve. A loud boom that makes you jump is more serious and warrants an immediate call. What a professional will do: Clean the burners to ensure proper gas flow, check the igniter for wear and replace it if necessary, test gas pressure and valve timing, and inspect the heat exchanger for any existing cracks. Cost to expect: Burner cleaning runs $100 to $200. Igniter replacement is $150 to $300. If a cracked heat exchanger is found, repair or replacement ranges from $500 to $2,000 depending on the severity and the age of the unit. Urgency level: High. Do not keep running a furnace that bangs at startup without having it inspected. Noise 2: Squealing or Screeching — Your Blower Motor Is Telling You Something A high-pitched squeal or screech coming from your furnace or air handler is one of the more unnerving sounds a homeowner can hear. The good news is that it is usually not dangerous. The less good news is that it will not fix itself and it will get worse. In almost every case, this sound points to one of two things. Either the blower motor bearings are wearing out, or the blower belt is fraying or slipping. Older furnaces used belt-driven blower motors where a rubber belt transferred power from the motor to the fan wheel. Newer systems use direct drive motors without belts, but the bearings inside them still wear out over time. When bearings wear out they generate friction. Friction generates heat. Heat accelerates wear. Eventually the motor seizes entirely and your furnace runs but no air moves through your home at all. At that point what would have been a simple repair becomes a full motor replacement. You can sometimes extend bearing life temporarily by lubricating the motor ports if your unit has accessible oil ports, but this is a short term measure. If the squeal is consistent and loud, you are past the lubrication stage. What a professional will do: Inspect the blower motor, belt if applicable, and bearings. Lubricate if still viable or replace the motor or belt as needed. Cost to expect: Belt replacement runs $100 to $200. Blower motor replacement is $300 to $600 depending on the motor type and your system’s age. Urgency level: Medium to high. Schedule a service call within the week. Do not wait until the motor fails completely because that usually happens on the coldest night of the year. Noise 3: Whistling — Your System Is Struggling to Breathe A whistling sound from your HVAC system is almost always an airflow problem. Think of it the same way you think of wind whistling through a gap in a window or door. Air is being forced through a space that is too small for the volume trying to pass through it. The most common causes in Richmond TX homes include a severely clogged air filter creating a pressure differential that forces air through small gaps, leaks or gaps in your ductwork where air escapes under pressure, a return air grille that is partially blocked or incorrectly sized for your system, and a damper inside your ductwork that has partially closed or become stuck. Start with the simplest fix first. Check your air filter. If it is visibly dirty or has been in place for more than 6 weeks

Strange smell coming from your AC or heater in Richmond TX? Some odors are harmless. Others mean shut it off right now. Temper Mechanical: (346) 485-8142
Uncategorized

AC Smells Like Mildew, Burning Plastic, or Rotten Eggs? Here Is What Your AC Is Trying to Tell You

AC Smells Like Mildew, Burning Plastic, or Rotten Eggs? Here Is What Your AC Is Trying to Tell You Your nose is often the first thing that tells you something is wrong with your AC or heating system — before any warning light, before any error code, and sometimes before any performance drop at all. Some smells coming from your vents are harmless and easy to fix yourself in an afternoon. Others are serious enough that you should shut your system off right now and not turn it back on until a licensed technician has looked at it. The problem is knowing which is which. That is exactly what this guide covers. We work with homeowners across Richmond TX, Sugar Land, Pecan Grove, Rosenberg, and Fort Bend County who call us after noticing a strange smell from their HVAC system. In our experience, the smell itself almost always points directly to the cause — if you know what to look for. If you are smelling something right now that worries you, call Temper Mechanical at (346) 485-8142. We offer same-day AC repair in Richmond TX and can diagnose smell-related issues quickly and safely. Otherwise, read on. This guide will tell you exactly what each smell means, how urgent it is, and what it typically costs to fix. Smell 1: Mildew or Musty Odor — The Most Common AC Smell in Fort Bend County If your AC smells like a damp basement or a wet towel that sat too long in the washing machine, you are dealing with mold or mildew somewhere in your system. And in Richmond TX’s climate, this is by far the most common AC complaint we hear. Here is why it happens so often here specifically. Fort Bend County sits in one of the most humid regions of Texas. When your AC runs, it pulls warm humid air over the evaporator coil, which causes moisture to condense on the coil surface. That moisture is supposed to drain away through the condensate drain line. But when the drain line gets clogged — which happens frequently because algae and mold grow readily in warm, wet, dark drain lines — that moisture sits and becomes a breeding ground for mold and mildew. The smell then gets picked up by the air moving through your system and pushed out into every room of your home through your supply vents. Other causes include mold growing inside your air ducts themselves, a dirty evaporator coil that has accumulated enough organic debris to support mold growth, or standing water in your drain pan. This smell is not immediately dangerous in most cases but it is not something to ignore. Mold spores circulating through your home’s air affect indoor air quality and can aggravate allergies, asthma, and respiratory conditions. In a home with children or elderly family members, this is especially worth addressing promptly. What to do right now: Replace your air filter, which may be harboring mold growth itself. Then check the area around your indoor air handler for any signs of water leakage or pooling around the drain pan. What a professional will do: Flush the condensate drain line, clean the evaporator coil, inspect the ductwork for mold growth, and check the drain pan for standing water or damage. Our air duct cleaning service in Richmond TX addresses mold and debris buildup inside ductwork specifically. Cost to expect: $100 to $300 for a drain line flush and coil cleaning. Duct cleaning runs $300 to $600 depending on the size of your home and the extent of buildup. Urgency level: Address within 1 to 2 weeks. Not an emergency but do not keep putting it off. Smell 2: Burning Plastic or Burning Rubber — Turn Your System Off Now This one is not subtle and it is not something you wait on. A burning plastic or burning rubber smell coming from your vents almost always means something electrical is overheating inside your system. This could be a failing capacitor, an overheating blower motor, damaged wiring with melting insulation, a contactor burning out, or a circuit board with a component that has failed and is generating heat it cannot dissipate. In rare cases it can also be something non-electrical, a piece of plastic that fell into a vent, a toy near a supply register, or a pest that found its way into ductwork. But do not assume that is the case before investigating. Why this is urgent: Electrical components that overheat can cause fires. HVAC systems run on significant electrical current and the combination of heat, electrical current, and flammable materials inside your system is not something to test. What to do right now: Turn your system off at the thermostat. Then go to your electrical panel and switch the breaker for your HVAC system to off as well. Do not turn it back on until a technician has inspected it. Call us at (346) 485-8142. This is one of the situations where same-day service is not just convenient, it is important. What a professional will do: Perform a full electrical inspection of the system including the capacitors, contactor, blower motor, wiring, and control board. Identify the component that is overheating, replace it, and verify that no other components were damaged by the heat event. Cost to expect: $150 to $600 depending on which component has failed. Capacitor replacement is on the lower end. Blower motor replacement runs $300 to $600. Control board replacement can reach $400 to $900. Urgency level: Immediate. Do not run the system with this smell present. Smell 3: Rotten Eggs or Sulfur — Leave the House If you smell rotten eggs or sulfur coming from anywhere near your HVAC system, furnace, or water heater, treat this as a gas emergency. Natural gas is odorless in its natural state. The sulfur smell you are detecting is actually a chemical called mercaptan that gas companies add to natural gas specifically so that leaks can be detected by smell. If you can

Uncategorized

Why Your AC Isn’t Cooling Properly Even Though It’s Running: 9 Hidden Reasons

There is nothing more frustrating than hearing your AC unit humming away outside, feeling the air blowing through your vents, and still sweating inside your own home. In Richmond TX, where summer temperatures regularly hit the mid to high 90s and the humidity makes it feel like you are breathing through a wet towel, an AC that runs but does not cool is not just uncomfortable. It is genuinely miserable. And it is costing you money every single hour it continues. The good news is that most of the reasons an AC stops cooling properly are diagnosable and fixable. Some you can address yourself today. Others need a licensed technician with the right equipment. This guide walks through all nine so you know exactly what you are dealing with. If you would rather skip the reading and just get it fixed, call Temper Mechanical at (346) 485-8142. We offer same-day AC repair in Richmond TX throughout Fort Bend County. Before You Read Further: A Quick Reality Check When your AC is running but not cooling, the instinct for most homeowners is to assume the worst. Compressor failure. Refrigerant gone. Full replacement needed. In our experience working with hundreds of homeowners across Richmond, Sugar Land, Pecan Grove, and Rosenberg, that is rarely the case. More than half the time the issue is something far simpler. A dirty filter. A blocked condenser. A thermostat that needs recalibrating. Work through this list in order. Start with the free and simple checks. You might find your answer in the first three minutes. Reason 1: Your Refrigerant Is Low or Leaking Refrigerant is the substance that actually removes heat from the air inside your home. When it is low, your AC blows air but cannot absorb heat the way it should. The result is air that feels slightly cool but never gets your home to the temperature you set. Signs you have a refrigerant problem include air coming from vents that feels only mildly cool even after running for an hour, ice forming on the copper lines outside your unit or on the indoor coil, a hissing or bubbling sound near the unit, and your electricity bill going up without any explanation. Here is what most homeowners do not know: refrigerant does not get used up. If it is low, there is a leak somewhere in the system. Simply adding more refrigerant without finding and fixing the leak is a temporary fix that will cost you again in 6 to 12 months. A licensed technician can pressure test your system to find the exact location of the leak, repair it, and then recharge the refrigerant to the correct level. Cost to expect: $200 to $1,500 depending on the severity of the leak and how much refrigerant needs to be added. The type of refrigerant your system uses also matters. Older systems using R-22 refrigerant are significantly more expensive to recharge because R-22 is being phased out globally. Reason 2: Your Air Filter Is Completely Clogged This is the most common cause of poor cooling that we find in Richmond TX homes and it is also the easiest to fix. Your AC system pulls warm air from inside your home through the return vents and passes it over the evaporator coil to cool it before sending it back through your supply vents. The air filter sits in this path and catches dust, pollen, pet hair, and other particles before they reach the coil. When that filter gets clogged, which in Fort Bend County’s humid environment happens faster than most homeowners expect, airflow through the system drops dramatically. Less air moving over the coil means less cooling happening per cycle. Your system runs longer, works harder, and still cannot get your home to temperature. Go check your filter right now. Pull it out and hold it up to a light. If you cannot see light through it, replace it today. A new filter costs between $10 and $25 and takes two minutes to install. In Fort Bend County we recommend checking your filter every 3 to 4 weeks during peak summer months. The combination of humidity, pollen, and how hard your system runs during Texas summers means filters fill up faster here than what the manufacturers typically account for. Reason 3: Your Condenser Coils Are Dirty Your outdoor AC unit contains the condenser coil, which is responsible for releasing the heat your system pulls from inside your home into the outdoor air. When this coil gets covered in dirt, grass clippings, cottonwood fluff, or debris, it cannot release heat efficiently. The result is that heat gets trapped in the system. Your AC runs and runs but the refrigerant never fully releases its heat load before cycling back inside to try again. Cooling capacity drops noticeably. You can see the condenser coil through the fins on the side of your outdoor unit. If it looks dark or matted with debris rather than clean silver metal, it needs cleaning. Carefully rinsing the outside of the unit with a garden hose, directing water from the inside out, can help. But for a thorough cleaning of the coil fins, a professional with the right coil cleaning solution and low-pressure equipment will do the job properly without bending the delicate fins that make the coil work. As a preventative measure, make sure nothing is growing too close to your outdoor unit. Keep at least two feet of clear space on all sides and at least five feet above. Richmond TX landscaping grows fast in the summer. What was two feet of clearance in April can be six inches by July. Reason 4: Your Evaporator Coil Is Frozen It might seem counterintuitive that an AC can get too cold, but it happens regularly. The evaporator coil inside your air handler needs a constant flow of warm air passing over it to function correctly. When airflow is restricted, usually by a dirty filter or a failing blower motor, the coil gets too cold

Uncategorized

How To Fix a Water Heater — Diagnosis, Repair Costs, and When To Call a Pr

Hot water is one of those things you never think about until it disappears. Then suddenly your morning routine stops completely. The shower runs cold. The dishes pile up. The kids are frustrated. And you are standing in front of your water heater closet trying to figure out what is wrong and whether you can fix it yourself or need to call someone. This guide gives you both answers. We are going to walk you through how to diagnose your specific problem, which issues you can genuinely fix yourself, which ones need a licensed plumber, and exactly what repairs cost in Richmond TX so you are never caught off guard by an invoice. If you already know you need a plumber and want help today, call Temper Mechanical at (346) 485-8142. We offer same-day water heater repair and replacement throughout Richmond TX, Sugar Land, Rosenberg, and Fort Bend County. Otherwise keep reading. This will save you time and almost certainly save you money. Step One — Figure Out Exactly What Is Wrong Before you call anyone or spend a dollar, spend five minutes on this checklist. Some of the most common water heater complaints have fixes that take less than ten minutes and cost nothing. No hot water at all on an electric water heater Go to your breaker panel and find the breaker labeled water heater. Check whether it has tripped to the middle position. Flip it fully off and then firmly back on. Wait 30 minutes and test your hot water again. A tripped breaker is one of the most common reasons electric water heaters stop working and it is the easiest fix in the book. No hot water at all on a gas water heater Check the pilot light. On most units built after 2010 there is a relight button directly on the unit with instructions printed on the label. Follow those instructions step by step. If the pilot lights but goes out again within a few seconds, the thermocouple is almost certainly failing and needs to be replaced by a technician. Water is warm but not hot enough The thermostat dial on your water heater may have been accidentally turned down. Find the dial on the front or side of the unit and confirm it is set to 120 degrees Fahrenheit, which is the recommended setting for most households. Turn it up slightly and give it an hour before testing again. Running out of hot water much faster than before This is almost always sediment buildup inside the tank. Fort Bend County has notoriously hard water and mineral deposits accumulate at the bottom of tanks faster here than in most parts of Texas. Sediment reduces the effective capacity of your tank and forces the heating element to work harder. This is not an emergency but it needs to be addressed. A professional tank flush can resolve it if caught early enough. Rumbling, popping, or knocking sounds Same cause as above. Sediment is sitting at the bottom of the tank and water is getting trapped beneath it as it heats. The unit still works but it is working significantly harder than it should. Left unaddressed this accelerates wear on the heating element and shortens the overall lifespan of the unit. Rotten egg smell from hot water This is caused by a reaction between naturally occurring sulfur in the water and the magnesium anode rod inside your tank. The anode rod is actually doing its job protecting the tank from corrosion, but the chemical byproduct creates that sulfur odor. Replacing the anode rod or switching to an aluminum version usually resolves it. Persistent water quality issues may also benefit from a whole-home water filtration or softener system that addresses the mineral content at the source. How To Fix Common Water Heater Problems Yourself Some water heater fixes are genuinely within reach for a homeowner with basic comfort around tools and utilities. Here is where the line falls. Relighting a pilot light This is the most accessible DIY fix on a gas water heater. The instructions are printed directly on your unit. Follow them carefully, hold the pilot button for a full 60 seconds after lighting, and release slowly. If the pilot stays lit you are done. If it goes out repeatedly stop and call a technician because the thermocouple needs professional replacement. Resetting a tripped breaker Completely safe to do yourself once. If the breaker trips again after being reset do not flip it a third time. A repeatedly tripping breaker means a component inside the system is drawing excess power and the breaker is doing its job protecting your home. That needs a licensed technician to diagnose safely. Adjusting the thermostat The temperature dial on most traditional tank water heaters is accessible without any tools. The Department of Energy recommends 120 degrees Fahrenheit for most households. Setting it higher than that does not provide meaningful benefit and accelerates wear on internal components while increasing your energy bill. Flushing sediment from the tank This is manageable for a homeowner comfortable with basic plumbing tasks. Turn off the power or gas to the unit, connect a garden hose to the drain valve at the bottom of the tank, run the hose to a floor drain or outside, open the drain valve, and let it drain until the water runs clear. Close the valve, remove the hose, turn the water supply back on, and restore power or gas once the tank is full. If you are not comfortable with this process, our technicians can perform a professional flush during any service visit. Problems That Need a Licensed Plumber These are not DIY repairs. Attempting them without proper training and equipment creates safety risks and in some cases voids your manufacturer warranty. Thermocouple replacement The thermocouple is a small safety sensor on gas water heaters that detects whether the pilot light is burning and allows gas to flow. When it fails the unit shuts off the gas supply as a

Furnace not turning on in Richmond TX? Check these 6 things first — then call Temper Mechanical if you need a pro. Same-day furnace repair: (346) 485-8142
Uncategorized

Furnace Won’t Turn On in Winter? Here’s What to Check Right Now

If your furnace stopped working in the middle of a cold Richmond TX night, the first thing to know is this: you are not alone, and in most cases, the fix is faster than you think. Before you panic or spend money on a service call, there are several things you can check yourself in the next 15 minutes. Some of them are simple enough that you will have heat again before the tech even picks up the phone. But some furnace problems are not safe to troubleshoot on your own. This guide will walk you through both so you know exactly when to handle it yourself and when to call a professional. If you already know you need help, call Temper Mechanical right now at (346) 485-8142. We offer same-day furnace repair in Richmond TX and serve Sugar Land, Rosenberg, Pecan Grove, and all of Fort Bend County. Safety First: Check for Carbon Monoxide Before Anything Else This is not optional. Before you start poking around your furnace, take 30 seconds to do this. If you have a carbon monoxide detector in your home, check it right now. If it is going off, get everyone out of the house immediately and call 911 from outside. Do not go back in. If you smell rotten eggs or sulfur near your furnace, that is a gas leak. Leave the house, leave the door open, do not turn any lights on or off, and call your gas company from the street. If neither of those things is happening, you are safe to continue troubleshooting. Keep reading. Step 1: Check Your Thermostat You would be surprised how often this is the culprit. It sounds too simple, but it is the first thing every HVAC technician checks when they arrive at a job. Go to your thermostat and confirm three things. First, make sure it is set to “Heat” and not “Cool” or “Fan Only.” Second, make sure the temperature is set at least 3 to 5 degrees above the current room temperature. If your house is 68 degrees and the thermostat is set to 68, the furnace has no reason to turn on. Third, if your thermostat runs on batteries, replace them. A low battery signal will sometimes not appear on screen but can still cause the thermostat to stop sending signals to your furnace. If you recently replaced your thermostat or had any electrical work done, there is a chance the wiring came loose. That is a job for a professional. Step 2: Check the Circuit Breaker Your furnace runs on electricity even if it is a gas unit. The blower motor, ignition system, and control board all need power to function. Go to your electrical panel and look for the breaker labeled “Furnace” or “HVAC” or “Air Handler.” If it is sitting in the middle position between on and off, it has tripped. Switch it all the way to off first, then firmly switch it back to on. If the breaker trips again within a few minutes of the furnace running, stop there and call us. A repeatedly tripping breaker means there is an electrical problem that needs a professional. Continuing to reset it can cause damage or create a fire hazard. Step 3: Check the Furnace Power Switch Most furnaces have a dedicated power switch on the unit itself. It looks exactly like a regular light switch and is usually mounted on the wall near the furnace or on the side of the unit. It gets switched off accidentally more often than you would think. Someone cleaning, a child playing nearby, or a previous technician who forgot to turn it back on. Check it and make sure it is in the on position. Step 4: Check Your Air Filter A clogged air filter can cause your furnace to overheat and shut itself off as a safety measure. When this happens, the furnace will not turn back on until it cools down, which can take anywhere from 30 minutes to a few hours. Pull your filter out and hold it up to a light. If you cannot see any light passing through it, it is clogged and needs to be replaced. A fresh filter costs $10 to $20 at any hardware store. Put a new one in, give the furnace 30 minutes to cool down, then try turning it back on. As a rule of thumb, filters in Richmond TX homes should be changed every 1 to 2 months during heavy use seasons. Fort Bend County’s humidity means your filter collects more debris than homes in drier climates. Step 5: Check the Pilot Light (Older Furnaces Only) If your furnace was installed before 2010, it likely has a standing pilot light. Look through the small viewing window on your furnace. There should be a small blue flame burning. If the pilot light is out, you can relight it yourself. Your furnace should have relighting instructions printed on a label near the pilot. The process generally involves turning the gas valve to “Pilot,” holding it down while you light the flame, holding it for 30 seconds, then turning the valve to “On.” If the pilot light goes out repeatedly, the thermocouple may be faulty. That is a $20 part but the replacement requires a technician. If you smell gas during this process, stop immediately and call your gas company. Newer furnaces use electronic ignition instead of a pilot light. If yours does and the ignition is failing, you will hear a clicking sound but the burners will not light. That is a job for a professional. Step 6: Check the Condensate Drain Line Modern high-efficiency furnaces produce condensation as a byproduct of heating. This condensation drains through a small PVC pipe. If that pipe gets clogged, a float switch shuts the furnace off automatically to prevent water damage. Look near the base of your furnace for a small drip pan or PVC drain line. If there is standing water in the

Scroll to Top