Temper Mechanical Air and Heat LLC

Author name: Alphalead seoteam

Uncategorized

Why Your AC Isn’t Cooling Properly Even Though It’s Running: 9 Hidden Reasons

There is nothing more frustrating than hearing your AC unit humming away outside, feeling the air blowing through your vents, and still sweating inside your own home. In Richmond TX, where summer temperatures regularly hit the mid to high 90s and the humidity makes it feel like you are breathing through a wet towel, an AC that runs but does not cool is not just uncomfortable. It is genuinely miserable. And it is costing you money every single hour it continues. The good news is that most of the reasons an AC stops cooling properly are diagnosable and fixable. Some you can address yourself today. Others need a licensed technician with the right equipment. This guide walks through all nine so you know exactly what you are dealing with. If you would rather skip the reading and just get it fixed, call Temper Mechanical at (346) 485-8142. We offer same-day AC repair in Richmond TX throughout Fort Bend County. Before You Read Further: A Quick Reality Check When your AC is running but not cooling, the instinct for most homeowners is to assume the worst. Compressor failure. Refrigerant gone. Full replacement needed. In our experience working with hundreds of homeowners across Richmond, Sugar Land, Pecan Grove, and Rosenberg, that is rarely the case. More than half the time the issue is something far simpler. A dirty filter. A blocked condenser. A thermostat that needs recalibrating. Work through this list in order. Start with the free and simple checks. You might find your answer in the first three minutes. Reason 1: Your Refrigerant Is Low or Leaking Refrigerant is the substance that actually removes heat from the air inside your home. When it is low, your AC blows air but cannot absorb heat the way it should. The result is air that feels slightly cool but never gets your home to the temperature you set. Signs you have a refrigerant problem include air coming from vents that feels only mildly cool even after running for an hour, ice forming on the copper lines outside your unit or on the indoor coil, a hissing or bubbling sound near the unit, and your electricity bill going up without any explanation. Here is what most homeowners do not know: refrigerant does not get used up. If it is low, there is a leak somewhere in the system. Simply adding more refrigerant without finding and fixing the leak is a temporary fix that will cost you again in 6 to 12 months. A licensed technician can pressure test your system to find the exact location of the leak, repair it, and then recharge the refrigerant to the correct level. Cost to expect: $200 to $1,500 depending on the severity of the leak and how much refrigerant needs to be added. The type of refrigerant your system uses also matters. Older systems using R-22 refrigerant are significantly more expensive to recharge because R-22 is being phased out globally. Reason 2: Your Air Filter Is Completely Clogged This is the most common cause of poor cooling that we find in Richmond TX homes and it is also the easiest to fix. Your AC system pulls warm air from inside your home through the return vents and passes it over the evaporator coil to cool it before sending it back through your supply vents. The air filter sits in this path and catches dust, pollen, pet hair, and other particles before they reach the coil. When that filter gets clogged, which in Fort Bend County’s humid environment happens faster than most homeowners expect, airflow through the system drops dramatically. Less air moving over the coil means less cooling happening per cycle. Your system runs longer, works harder, and still cannot get your home to temperature. Go check your filter right now. Pull it out and hold it up to a light. If you cannot see light through it, replace it today. A new filter costs between $10 and $25 and takes two minutes to install. In Fort Bend County we recommend checking your filter every 3 to 4 weeks during peak summer months. The combination of humidity, pollen, and how hard your system runs during Texas summers means filters fill up faster here than what the manufacturers typically account for. Reason 3: Your Condenser Coils Are Dirty Your outdoor AC unit contains the condenser coil, which is responsible for releasing the heat your system pulls from inside your home into the outdoor air. When this coil gets covered in dirt, grass clippings, cottonwood fluff, or debris, it cannot release heat efficiently. The result is that heat gets trapped in the system. Your AC runs and runs but the refrigerant never fully releases its heat load before cycling back inside to try again. Cooling capacity drops noticeably. You can see the condenser coil through the fins on the side of your outdoor unit. If it looks dark or matted with debris rather than clean silver metal, it needs cleaning. Carefully rinsing the outside of the unit with a garden hose, directing water from the inside out, can help. But for a thorough cleaning of the coil fins, a professional with the right coil cleaning solution and low-pressure equipment will do the job properly without bending the delicate fins that make the coil work. As a preventative measure, make sure nothing is growing too close to your outdoor unit. Keep at least two feet of clear space on all sides and at least five feet above. Richmond TX landscaping grows fast in the summer. What was two feet of clearance in April can be six inches by July. Reason 4: Your Evaporator Coil Is Frozen It might seem counterintuitive that an AC can get too cold, but it happens regularly. The evaporator coil inside your air handler needs a constant flow of warm air passing over it to function correctly. When airflow is restricted, usually by a dirty filter or a failing blower motor, the coil gets too cold

Uncategorized

Water Heater Leaking or Not Working? Quick Diagnosis and What It Really Costs to Fix

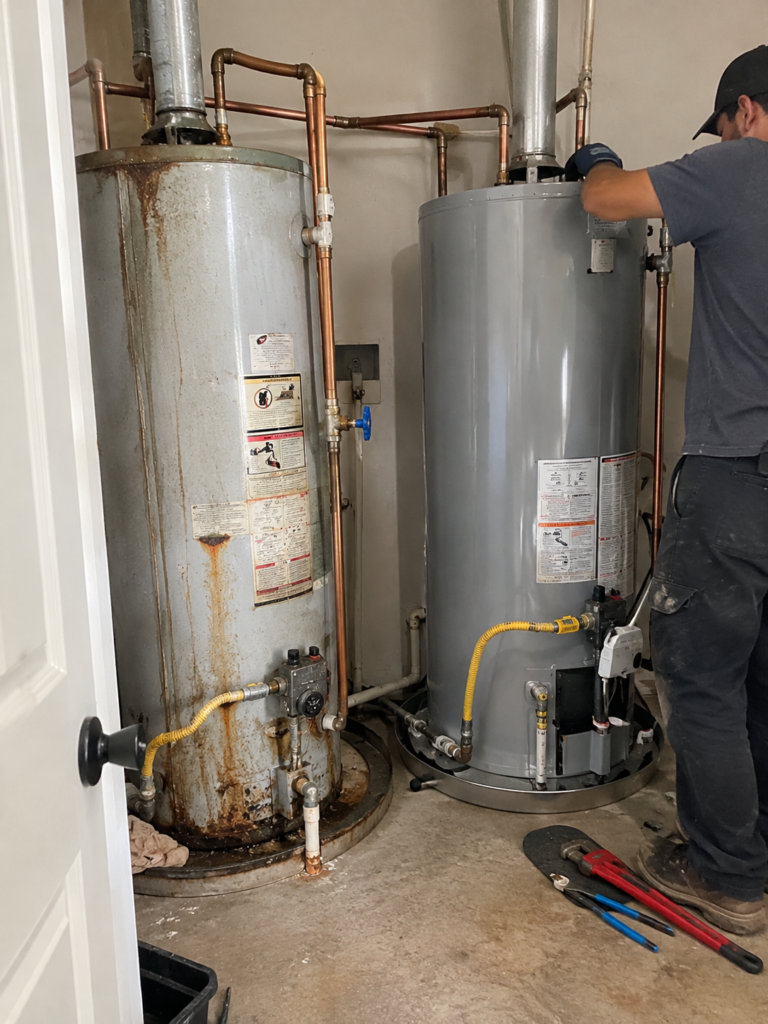
Hot water is one of those things you never think about until it is gone. Then suddenly everything stops. The morning shower turns freezing cold. The dishes pile up. The kids are complaining. And you are standing in front of your water heater closet wondering what on earth is going on and how much this is going to cost you. If that is where you are right now, this guide is written specifically for you. We work with homeowners across Richmond TX, Sugar Land, Rosenberg, and Fort Bend County every week who are dealing with exactly this situation. Some of their problems turn out to be minor fixes that cost almost nothing. Others need a full replacement. The key is knowing which one you are dealing with before anyone starts charging you. If you already know you need a local plumber in Richmond TX and want help today, call Temper Mechanical at (346) 485-8142. We offer same-day water heater repair and service throughout Fort Bend County. Otherwise, keep reading. This will save you time and very likely save you money. Is It Actually Broken or Just a Minor Issue? Before assuming the worst, run through this quick checklist. You might be surprised. No hot water at all: Check your circuit breaker first if you have an electric water heater. The breaker labeled “Water Heater” may have tripped. Switch it fully off then firmly back on. For gas water heaters, check that the pilot light is still lit. On most units built after 2010, there is a relight button on the unit itself with instructions printed on the label nearby. Water is warm but not hot enough: Your thermostat setting on the water heater itself may have been bumped down accidentally. The recommended setting for most households is 120 degrees Fahrenheit. It is usually a dial on the front or side of the unit. Turn it up slightly and wait an hour to see if it makes a difference. Running out of hot water faster than usual: This often points to sediment buildup inside the tank, which reduces the amount of usable hot water your heater can hold. Fort Bend County has notoriously hard water, which means sediment buildup happens faster here than in most parts of Texas. This is not an emergency but it does need to be addressed. Hearing rumbling, popping, or knocking sounds: Again, almost always sediment. When mineral deposits build up at the bottom of the tank, water gets trapped underneath and boils, creating those unsettling noises. The unit still works but it is working much harder than it should. If none of these quick checks resolve your issue, keep reading. Common Water Heater Problems and What Causes Them Understanding what is actually wrong inside your water heater helps you have a smarter conversation with any technician and makes sure you are not being charged for something you do not need. No hot water (electric heater): The most common cause is a failed heating element. Electric water heaters have two elements, an upper and a lower one. When one fails, you often get lukewarm water rather than no water at all. When both fail, nothing comes out hot. Replacing a heating element is a relatively inexpensive repair in most cases. No hot water (gas heater): Beyond the pilot light, the thermocouple is the most frequent culprit. The thermocouple is a small sensor that tells your water heater the pilot light is on and it is safe to release gas. When it wears out, the safety mechanism kicks in and shuts off the gas supply completely. It is a small part but it has a big effect. Water that smells like rotten eggs: This is particularly common with well water in areas like Santa Fe TX, but it also happens with municipal water in Fort Bend County. It is caused by a reaction between sulfur in the water and the magnesium anode rod inside your tank. The anode rod is actually doing its job protecting your tank from corrosion, but the byproduct is that sulfur smell. Replacing the anode rod or switching to an aluminum one usually resolves it. Our water filtration and softener services can also address the root cause if your water quality is contributing to the problem. Discolored or rusty water: Rust-colored water coming from your hot tap means one of two things. Either the anode rod has completely worn out and the tank itself is starting to corrode from the inside, or the pipes leading to and from the unit are rusting. If the tank itself is rusting internally, repair is rarely worth it. Replacement is usually the right call. Pressure relief valve releasing water: The pressure relief valve, sometimes called the T&P valve, is a safety device designed to release pressure if your tank gets dangerously hot or over-pressurized. If you see water dripping or spraying from a small valve on the side of your water heater, do not ignore it. It either means the valve itself has failed and needs replacement, or your water pressure is genuinely too high, which is a separate plumbing issue that needs attention. Either way this is not something to wait on. Is a Leaking Water Heater an Emergency? This depends entirely on where the leak is coming from. Leaking from the top of the unit: Usually not an immediate emergency. The most common causes are a loose cold water inlet pipe, a faulty anode rod port, or a failing pressure relief valve. These are repairable in most cases. Turn off the cold water supply to the heater while you wait for a technician and you will avoid the leak getting worse. Leaking from the bottom of the unit: This is more serious. Water pooling under the tank typically means the tank itself has corroded internally and is failing. Once a tank starts leaking from the base, it cannot be repaired. Replacement is the only option. The risk here is that a small leak becomes a

Furnace not turning on in Richmond TX? Check these 6 things first — then call Temper Mechanical if you need a pro. Same-day furnace repair: (346) 485-8142
Uncategorized

Furnace Won’t Turn On in Winter? Here’s What to Check Right Now

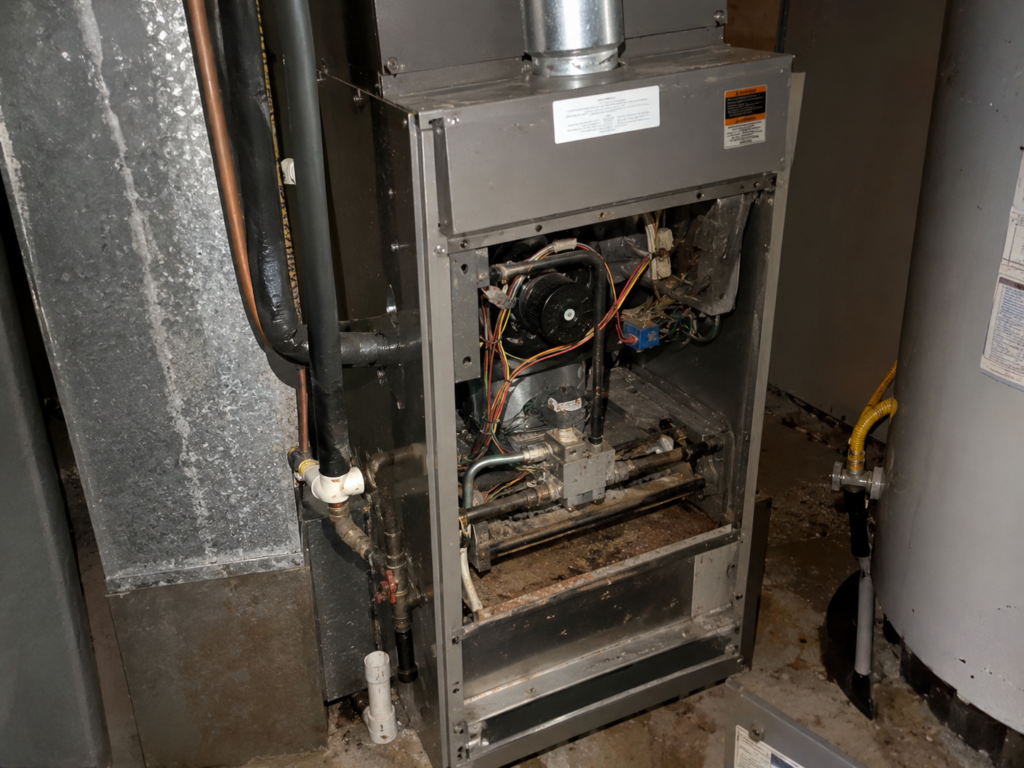
If your furnace stopped working in the middle of a cold Richmond TX night, the first thing to know is this: you are not alone, and in most cases, the fix is faster than you think. Before you panic or spend money on a service call, there are several things you can check yourself in the next 15 minutes. Some of them are simple enough that you will have heat again before the tech even picks up the phone. But some furnace problems are not safe to troubleshoot on your own. This guide will walk you through both so you know exactly when to handle it yourself and when to call a professional. If you already know you need help, call Temper Mechanical right now at (346) 485-8142. We offer same-day furnace repair in Richmond TX and serve Sugar Land, Rosenberg, Pecan Grove, and all of Fort Bend County. Safety First: Check for Carbon Monoxide Before Anything Else This is not optional. Before you start poking around your furnace, take 30 seconds to do this. If you have a carbon monoxide detector in your home, check it right now. If it is going off, get everyone out of the house immediately and call 911 from outside. Do not go back in. If you smell rotten eggs or sulfur near your furnace, that is a gas leak. Leave the house, leave the door open, do not turn any lights on or off, and call your gas company from the street. If neither of those things is happening, you are safe to continue troubleshooting. Keep reading. Step 1: Check Your Thermostat You would be surprised how often this is the culprit. It sounds too simple, but it is the first thing every HVAC technician checks when they arrive at a job. Go to your thermostat and confirm three things. First, make sure it is set to “Heat” and not “Cool” or “Fan Only.” Second, make sure the temperature is set at least 3 to 5 degrees above the current room temperature. If your house is 68 degrees and the thermostat is set to 68, the furnace has no reason to turn on. Third, if your thermostat runs on batteries, replace them. A low battery signal will sometimes not appear on screen but can still cause the thermostat to stop sending signals to your furnace. If you recently replaced your thermostat or had any electrical work done, there is a chance the wiring came loose. That is a job for a professional. Step 2: Check the Circuit Breaker Your furnace runs on electricity even if it is a gas unit. The blower motor, ignition system, and control board all need power to function. Go to your electrical panel and look for the breaker labeled “Furnace” or “HVAC” or “Air Handler.” If it is sitting in the middle position between on and off, it has tripped. Switch it all the way to off first, then firmly switch it back to on. If the breaker trips again within a few minutes of the furnace running, stop there and call us. A repeatedly tripping breaker means there is an electrical problem that needs a professional. Continuing to reset it can cause damage or create a fire hazard. Step 3: Check the Furnace Power Switch Most furnaces have a dedicated power switch on the unit itself. It looks exactly like a regular light switch and is usually mounted on the wall near the furnace or on the side of the unit. It gets switched off accidentally more often than you would think. Someone cleaning, a child playing nearby, or a previous technician who forgot to turn it back on. Check it and make sure it is in the on position. Step 4: Check Your Air Filter A clogged air filter can cause your furnace to overheat and shut itself off as a safety measure. When this happens, the furnace will not turn back on until it cools down, which can take anywhere from 30 minutes to a few hours. Pull your filter out and hold it up to a light. If you cannot see any light passing through it, it is clogged and needs to be replaced. A fresh filter costs $10 to $20 at any hardware store. Put a new one in, give the furnace 30 minutes to cool down, then try turning it back on. As a rule of thumb, filters in Richmond TX homes should be changed every 1 to 2 months during heavy use seasons. Fort Bend County’s humidity means your filter collects more debris than homes in drier climates. Step 5: Check the Pilot Light (Older Furnaces Only) If your furnace was installed before 2010, it likely has a standing pilot light. Look through the small viewing window on your furnace. There should be a small blue flame burning. If the pilot light is out, you can relight it yourself. Your furnace should have relighting instructions printed on a label near the pilot. The process generally involves turning the gas valve to “Pilot,” holding it down while you light the flame, holding it for 30 seconds, then turning the valve to “On.” If the pilot light goes out repeatedly, the thermocouple may be faulty. That is a $20 part but the replacement requires a technician. If you smell gas during this process, stop immediately and call your gas company. Newer furnaces use electronic ignition instead of a pilot light. If yours does and the ignition is failing, you will hear a clicking sound but the burners will not light. That is a job for a professional. Step 6: Check the Condensate Drain Line Modern high-efficiency furnaces produce condensation as a byproduct of heating. This condensation drains through a small PVC pipe. If that pipe gets clogged, a float switch shuts the furnace off automatically to prevent water damage. Look near the base of your furnace for a small drip pan or PVC drain line. If there is standing water in the

Burst Pipe or Water Leak in Richmond TX? Do This Right Now
Uncategorized

Water Leak or Burst Pipe in Richmond TX? Here Is What To Do Right Now

Water Leak or Burst Pipe in Richmond TX? Here Is What To Do Right Now Water is pouring where it should not be. Maybe it is coming through the ceiling. Maybe it is backing up through the toilet. Maybe you heard a sound behind the wall that you have never heard before and now there is moisture spreading across your floor faster than you can grab towels. Whatever is happening in your home right now, the next ten minutes matter more than anything that comes after them. This guide gives you the exact steps to take right now to protect your home, your family, and your property before a licensed plumber arrives. We are going to move fast because you do not have time for filler. If you are already past reading and just need someone there immediately, call Temper Mechanical at +1 (346) 485-8142. We offer same-day emergency plumbing service across Richmond TX, Sugar Land, Rosenberg, Pecan Grove, and Fort Bend County. We answer seven days a week. Steps To Take RIGHT NOW — Do These Before Anything Else These first steps are not optional. Every minute you skip them is another minute water is doing damage to your floors, walls, cabinets, and foundation. Move through this list as fast as you safely can. Shut off your water supply immediately. This is the single most important action you can take in a plumbing emergency. Every home has a main water shutoff valve that stops all water flow into the house entirely. In most Richmond TX homes this valve is located near the front of the house either inside a utility closet, in the garage, or outside near the foundation close to the water meter. Turn it clockwise until it stops completely. If you cannot find the main shutoff, go directly to your water meter at the street and turn off the supply there. Do not wait until you find the source of the leak to do this. Shut the water off first and find the source second. Get everyone away from standing water near electrical outlets or panels. Water and electricity together create a life-threatening situation that most homeowners do not think about in the panic of a plumbing emergency. If water is pooling near any electrical outlet, appliance, breaker panel, or visible wiring, do not step in it. Go to your breaker panel from a dry path and turn off the power to the affected area or the entire home if you are not sure which circuits run through the wet zone. Open a cold water faucet to drain remaining pressure. After shutting off the main supply, open a cold water faucet at the lowest point in your home, usually a utility sink or outdoor hose bib. This releases the remaining water pressure in the lines and reduces how much water continues to flow out from the break or leak point. Start damage control with what you have. Grab every towel, bucket, and tarp in your home. Contain the water as much as possible to prevent it from spreading to additional rooms or soaking into subflooring. If water is coming through the ceiling, use a screwdriver to carefully poke a small hole in the lowest point of the bulge. This sounds counterintuitive but it is the right move. Controlled drainage through a small hole prevents the entire ceiling section from collapsing under the weight of accumulated water. Put a bucket underneath and let it drain in a controlled way. Document everything before cleaning up. Once the immediate crisis is contained, walk through and take photos and video of all visible damage before moving anything or drying anything out. Your homeowner’s insurance claim will depend on this documentation. Do not skip it. Now call +1 (346) 485-8142 and get a licensed plumber on the way. How To Identify What Kind of Plumbing Emergency You Are Dealing With Not all plumbing emergencies look the same and identifying the type helps the technician who is coming prepare for the right repair before they even arrive at your home. Burst Pipe A burst pipe usually announces itself suddenly and dramatically. You hear a bang or a rushing sound, and water appears quickly and in significant volume. Burst pipes in Richmond TX homes happen most commonly during the rare hard freeze events when temperatures drop fast overnight, inside walls where pipes have developed stress fractures over time, and in older cast iron lines that have corroded past the point of structural integrity. If you suspect a burst pipe, the main shutoff is non-negotiable. Get it closed immediately. Active Water Leak Behind Walls or Under Slabs These are the sneaky emergencies. Water appears in places that do not make sense, like a wet spot on the floor in the middle of the room, a wall that feels damp without any visible source, or a water bill that has suddenly spiked without any change in usage. Richmond TX homes built on clay soil are particularly vulnerable to slab leaks because the Beaumont Clay beneath Fort Bend County homes shifts seasonally and puts ongoing stress on underground pipes. A slow slab leak can go undetected for months while causing significant foundation and flooring damage underneath your home. Backed-Up Sewer Line When multiple drains in your home are backing up simultaneously, the problem is not in an individual drain. It is in the main sewer line. A toilet backing up by itself might be a localized clog. A toilet, shower, and bathroom sink all backing up at the same time means the main line is blocked or compromised. Do not use any water in the house if you suspect a main sewer line backup. Every flush and every drain cycle pushes more sewage back toward your living space. Shut the water off and call immediately. Backed-Up Toilet With Overflow Risk A single toilet that is backed up and close to overflowing is a contained but urgent problem. Reach into the tank at the back of the

AC stopped working in Richmond heat? Here's exactly what to do in the first 10 minutes. Troubleshooting steps, emergency repair costs & how to get same-day help. Call now.
Uncategorized

Emergency AC Repair Guide: What To Do When Your AC Goes Down in 95° Heat

Emergency AC Repair Guide: What To Do When Your AC Goes Down in 95° Heat Your AC just stopped working. It is the middle of the afternoon, the thermometer outside is pushing 95 degrees, and your house is already starting to feel like a greenhouse. Your phone is in your hand and your mind is racing between panic and frustration. Stop. Take a breath. You have more control over this situation than you think right now. This guide is going to walk you through exactly what to do in the next hour, what is likely causing the problem, when you need a professional versus when you can handle it yourself, and how to make sure the person you call actually shows up and fixes it right. By the time you finish reading this you will know exactly where you stand and exactly what your next move is. If you are already past the point of troubleshooting and just need someone out there now, call Temper Mechanical directly at +1 (346) 485-8142. We offer same-day emergency AC repair across Richmond TX, Sugar Land, Rosenberg, Pecan Grove, and Fort Bend County. We answer seven days a week. Otherwise, let us get into it. What To Do in the First 10 Minutes The first ten minutes after your AC stops working are the most important because the decisions you make right now either shorten or extend how long your family sits in the heat. Here is a clear sequence to follow. Minute one through three: Get everyone comfortable first. Before you touch anything related to the AC system, close every blind and curtain on the sun-facing side of your home. This single step slows down how fast the indoor temperature climbs while you figure out what is going on. Move everyone including pets to the lowest floor of the house because heat rises and the ground floor will always be several degrees cooler. Turn on ceiling fans and box fans if you have them. Moving air feels significantly cooler even without a temperature change. Minute three through six: Check for the obvious. Go to your thermostat. Make sure it is set to cool and not heat or fan only. Make sure the set temperature is below the current indoor temperature. This sounds too simple to be the problem but you would be surprised how often it actually is, especially after a power flicker or a child playing with the settings. Minute six through ten: Check your breaker panel. Walk to your electrical panel and look for the breaker labeled air conditioner, AC, or air handler. In many Richmond TX homes there are two separate breakers for the system, one for the outdoor condenser unit and one for the indoor air handler. If either has tripped to the middle position, flip it fully off and then firmly back to the on position. Wait five minutes and see if the system starts. If the breaker trips again immediately, do not flip it a third time. A breaker that keeps tripping means something in the system is drawing too much power and forcing the breaker to protect the circuit. That needs a technician. Full Troubleshooting Steps Before You Call Anyone If the quick checks above did not bring your system back, work through these additional steps before picking up the phone. Some of these are simple fixes that save you a service call entirely. Check your air filter. Pull the filter out of your return air vent or air handler and hold it up to the light. If you cannot see light through it at all it is severely clogged and needs to be replaced immediately. A completely blocked filter restricts airflow so heavily that the system either shuts itself down as a protective measure or the evaporator coil freezes solid. Replace the filter and if the coil has iced over, turn the system off completely and let it thaw for one to two hours before restarting. Check your signs you need an HVAC tune-up because a repeatedly clogging filter is often one of the first indicators that your system needs attention beyond just a filter swap. Check the outdoor unit. Go outside and look at your condenser unit, the large box sitting on a concrete pad outside your home. Is it running? Can you hear the fan? Is there any visible ice on the refrigerant lines running into the house? If the outdoor unit is completely silent while the indoor unit is running, the condenser has either lost power or a component inside it has failed. If you see ice on the copper lines leading into your home, shut the system off at the thermostat and let it thaw before running it again. Check your condensate drain line. Your AC system removes humidity from your indoor air and drains that water through a PVC condensate line, usually running from your air handler to a floor drain or outside your home. When algae or debris clogs this line the drain pan fills up and a float switch inside the pan shuts the entire system down to prevent water damage to your home. Look for a small PVC pipe near your air handler and check if water is backing up or overflowing from the pan. This is one of the most common causes of summer shutdowns and one of the quickest fixes when it is the culprit. Reset your thermostat. Some programmable and smart thermostats have a reset function that clears error states. Remove the batteries for 30 seconds if it is battery powered, then reinstall them. If it is hardwired, turn the system off at the breaker for 30 seconds and back on. Wait a full five minutes before trying to run the system again since most AC systems have a built-in time delay after a power interruption to protect the compressor from short cycling. If you have worked through all of these steps and the system is still not functioning, the problem is internal

AC stopped working in Richmond TX? Here is what to check in the next 30 minutes and when to call for emergency repair. Same-day service available. Call Temper Mechanical: (346) 485-8142.
Uncategorized

AC Stopped Working in Richmond TX? Here’s What to Do in the Next 30 Minutes

Emergency AC Repair · Richmond, TX · Available Now AC Not Working in Richmond TX?Call Temper Mechanical Now: (346) 485-8142 Same-Day AC Repair in Richmond TX Claim $50 Off HVAC Repair Richmond, Sugar Land, Rosenberg, Pecan Grove 7 Days a Week · Same-Day Available (346) 485-8142 🔥 Limited Offer: $50 OFF any HVAC repair — mention this page when you call View Special Offer AC Emergency in Progress? We know how brutal Richmond TX summers get. When your AC stops working, especially at night or on weekends, it is not just uncomfortable, it is a health risk. For same-day AC repair in Richmond TX, call us now at (346) 485-8142. We serve Richmond, Sugar Land, Rosenberg, and Pecan Grove. Still with us? Good. Let us help you figure out what is happening right now. 3 Things to Check Before We Arrive Before you assume the worst, run through these three quick checks. They take less than five minutes and in some cases one of them turns out to be the actual problem. It happens more often than you would think. 1 Check your thermostat first Make sure it is set to cool and not heat or fan only, and that the set temperature is actually below the current room temperature. If it is set to 78 degrees when your house is already 78 degrees the system has no reason to turn on. Check the batteries too — a dead battery shows a blank screen and prevents communication with your system entirely. 2 Check your circuit breaker Go to your breaker panel and look for the breaker labeled air conditioner, AC, or air handler. Sometimes there are two — one for the indoor unit and one for the outdoor. If either has tripped to the middle position, flip it fully off and then back on. A tripped breaker is one of the most common reasons an AC system stops responding. 3 Check your air filter Pull out your air filter and hold it up to the light. If you cannot see light passing through it at all, it is completely clogged. A severely blocked filter restricts airflow to the point where the system either shuts down or freezes up entirely. Replacing a clogged filter sometimes gets a system running again within 30 minutes once the ice thaws. If you checked all three and everything looks fine, the problem is inside the system and you need a technician. Call us at (346) 485-8142 and we will get someone out to you. Why Your AC Stopped Working — Top Causes We See in Richmond TX Richmond TX heat puts serious stress on air conditioning systems from May through September. Here are the most common reasons systems fail and what each one means for your repair. Capacitor Failure The number one cause of AC breakdowns across Fort Bend County, particularly during heat waves. The capacitor gives the compressor and fan motors the electrical boost they need to start and keep running. Capacitors wear out faster in extreme heat — when one fails the system either refuses to start or runs briefly and shuts back off. One of the more straightforward and affordable repairs we make. Refrigerant Leak If your system is running but blowing warm or only slightly cool air, a refrigerant leak is a likely cause. Low refrigerant means the system cannot absorb and transfer heat effectively. Recharging refrigerant without fixing the leak is a temporary fix — the right repair addresses the source of the leak first. Dirty Evaporator Coil The evaporator coil absorbs heat from your indoor air. When coated in dust and debris it cannot do that job efficiently. In some cases a dirty coil freezes over completely, blocking airflow and causing the system to stop cooling. You may notice ice on the refrigerant lines near your indoor unit. Condensate Drain Clog Your AC removes moisture from the air as it cools. That water drains through a condensate line. When that line clogs with algae or debris, the drain pan fills up and a float switch shuts the system down to prevent water damage. One of the most preventable issues with regular maintenance. Compressor Failure The compressor is the heart of your AC system. When it fails, the system fails completely. Compressor issues are the most serious and most expensive repair, and in older systems the cost often makes a full AC installation Richmond TX the more sensible financial decision. We always give you an honest comparison of both options before recommending either. How Much Does Emergency AC Repair Cost in Richmond TX? This is the question you are probably wondering about right now and you deserve a straight answer. Before you call — check our $50 off HVAC repair special first. Mention this page when you book and we will apply the discount automatically to your service call. Repair Type Typical Cost Range Capacitor Replacement $150 – $300 Refrigerant Recharge + Leak Repair $200 – $500 Condensate Drain Clearing $75 – $150 Evaporator Coil Cleaning $150 – $350 Compressor Replacement $1,200 – $2,500 Before we start any work we give you the exact price. No surprises, no after-the-fact additions, and no pressure to approve anything you are not comfortable with. You decide, we work. What to Do While You Wait for Us Waiting for a technician in a hot house is miserable, but these steps will help you and your family stay as comfortable as possible until we arrive. Our team also covers HVAC service in Pecan Grove TX and the surrounding 77406 area — so if you are nearby, we are on our way. Move to the Lowest Floor Heat rises — the ground floor will always be several degrees cooler than upstairs rooms. Close every blind and curtain on the sunny side of your house to block radiant heat. Run Ceiling or Box Fans Turn on fans and position them to move air across the room. Moving air feels cooler even when the temperature is the

Plumbing & Water Heater Services · Richmond, TX Water Heater Not Working or Leaking in Richmond TX? Here’s What to Do Right Now
Uncategorized

Water Heater Not Working or Leaking in Richmond TX? Here’s What to Do Right Now

Plumbing & Water Heater Services · Richmond, TX Water Heater Not Working or Leaking in Richmond TX? Here’s What to Do Right Now Richmond TX & Fort Bend County Same-Day Service Available (346) 485-8142 Need Help Right Now?If your water heater is leaking or has stopped working, call Temper Mechanical at (346) 485-8142. We serve Richmond TX, Sugar Land, Rosenberg, and Fort Bend County with same-day service available. Our emergency plumbing Richmond TX team is ready when you need us. If you want to understand what is happening first, keep reading. Is Your Water Heater Leaking? Do These 3 Things First Finding water pooling around your water heater is alarming, but take a breath. Most leaks are manageable if you act quickly and calmly. Before you call a local plumber in Richmond TX, do these three things right now. 1 Turn off the water supply valve There is a cold water shutoff valve located on the pipe going into the top of your water heater. Turn it clockwise until it stops. This cuts the water supply to the tank and prevents more water from flowing in and making the situation worse. 2 Turn off the power or gas If you have an electric water heater, go to your breaker panel and flip the breaker labeled water heater to the off position. If you have a gas unit, look for the dedicated gas shutoff valve near the base of the unit and turn it to the off position. Do not skip this step. Water and live electricity or open gas lines do not mix. 3 Put towels or buckets down This sounds simple but it matters. Protecting your floors from water damage while you wait for a technician saves you from a secondary problem on top of the one you already have. That is it. You have done everything you can do safely on your own. Now let a licensed professional take it from here. Common Water Heater Problems We Fix in Richmond TX Water heaters rarely fail without giving some kind of warning first. Here are the most common issues we diagnose and repair for homeowners across Fort Bend County and what each one usually means. No Hot Water at All If you are getting completely cold water from every tap, the issue is usually a failed heating element on an electric unit or a pilot light and ignition problem on a gas system. In some cases a tripped breaker or a faulty thermostat is the culprit. This is one of the more straightforward diagnostics we perform and in many cases can be resolved in a single visit. Not Enough Hot Water If your hot water runs out faster than it used to, or the shower goes cold before everyone in the house has had a chance, the most common causes are a failing lower heating element, sediment buildup reducing the effective capacity of the tank, or a unit that was simply undersized for your household’s current demand. Fort Bend County’s hard water accelerates sediment accumulation significantly, which makes this a particularly common issue in Richmond TX homes. Water Too Hot Scalding water coming out of your taps points directly to a faulty thermostat or a temperature pressure relief valve that is not regulating correctly. Both situations need prompt attention. A thermostat set or malfunctioning above the safe range creates a real safety concern for your household, especially if you have children. Strange Noises Popping, rumbling, or banging sounds coming from your water heater tank are the sound of sediment buildup being disturbed as the water heats around it. Over time, that sediment layer insulates the water from the heating element and forces the unit to work harder and longer. Flushing the tank can resolve this early on, but in units with heavy buildup the sediment layer may have already caused damage that requires more attention. Discolored or Rusty Water Brown or reddish water coming from your hot taps is a sign that the interior of your tank is corroding. Water heaters have a sacrificial anode rod designed to absorb corrosion before it reaches the tank walls, but once that rod is depleted the tank itself begins to rust from the inside. Discolored water is one of the clearest signals that a water heater is approaching the end of its reliable service life. Leaking From the Top A leak at the top of the unit is usually coming from a loose or corroded pipe connection, a faulty cold water inlet or hot water outlet fitting, or a failing pressure relief valve. These are generally more straightforward repairs than leaks at the bottom because they involve the connections and components rather than the tank itself. Leaking From the Bottom A leak from the bottom of the tank is a more serious finding. It often indicates internal corrosion that has compromised the tank wall, and in most cases a unit leaking from the bottom is past the point where repair is a practical solution. Replacement is typically the honest recommendation here, and the sooner it happens the less secondary water damage you deal with. How Much Does Water Heater Repair Cost in Richmond TX? This is the question every homeowner wants answered honestly before committing to anything, and we think that is completely reasonable. Service Type Typical Cost Range Element Replacement $150 – $250 Thermostat Fix $150 – $300 Pressure Relief Valve $150 – $400 Anode Rod Service $150 – $300 Traditional Tank Replacement $800 – $2,000 Tankless Water Heater Installation $1,500+ One thing worth knowing specifically about Richmond TX and the broader Fort Bend County area is that the local water supply is notably hard. That mineral content accelerates the buildup of sediment inside tanks, degrades anode rods faster, and shortens the effective service life of water heaters. A unit that might last 12 years in a softer water region may show significant wear in 8 to 10 years here. Our water filtration and softener services can help protect your

Why Richmond's Clay Soil is the #1 Enemy of Your Home's Plumbing
Uncategorized

Why Richmond’s Clay Soil is the #1 Enemy of Your Home’s Plumbing

If you have lived in The Grove or Pecan Grove for any length of time, you already know that this part of Richmond TX is a genuinely wonderful place to put down roots. Beautiful neighborhoods, mature trees, well-kept homes, and a real sense of community. What most homeowners here d o not know, at least not until something goes wrong, is that the ground beneath those homes has been quietly working against their plumbing since the day the foundation was poured. This is not a scare story. It is a straightforward explanation of something that affects thousands of homes in the 77406 area, and understanding it is the first step toward protecting your property before a small issue becomes a large one. The Ground Beneath Your Home Is Not Sitting Still The soil throughout the Richmond TX area, including The Grove and Pecan Grove, is predominantly what geologists and engineers refer to as Beaumont Clay. This is an expansive clay soil, meaning it does not behave the way most people assume soil behaves. Most of us picture soil as something stable and fixed. It sits there, it holds things up, and it stays put. Beaumont Clay does not work that way. It acts more like a slow-motion sponge. When rainfall is heavy and moisture saturates the ground, this clay absorbs water and swells. When dry summer conditions set in and that moisture evaporates, the clay contracts and pulls back. Back and forth, season after season, year after year. In a place like Richmond TX where summers are long and dry and storm seasons can drop significant rainfall in short periods, that cycle of swelling and shrinking happens repeatedly throughout the year. The ground beneath your home is in a constant state of gradual movement, and most homeowners never feel it or see it directly. But your underground pipes do. What This Movement Does to Your Plumbing When soil shifts, it does not move in a perfectly uniform way. Different sections of ground absorb and release moisture at different rates depending on drainage patterns, tree root systems, irrigation, and how the grade of your property channels water. This uneven movement creates what engineers call shear stress on anything buried in the ground. Your underground sewer lines and water supply pipes sit directly in this environment. Whether they are made of PVC or older cast iron, they were installed as straight, connected, sealed systems. When the soil around them shifts in different directions at different rates, that stress accumulates at the joints, the connection points, and any section where the pipe changes direction. Over time, joints begin to separate. Pipes develop hairline cracks. Sections that were once perfectly aligned begin to offset, meaning one end shifts slightly out of position from the other. None of this happens dramatically or suddenly. It happens slowly, consistently, and silently over years of seasonal soil movement. By the time most homeowners in the 77406 area notice a symptom, the underlying issue has usually been developing for quite a while. Your Home Is Trying to Tell You Something Here is where things get interesting. Underground pipe damage does not always announce itself through an obvious plumbing failure. A lot of the early warning signs look like home maintenance issues rather than plumbing problems, which is exactly why they get misread or ignored for longer than they should be. Pay attention if you notice any of these in your home: Interior doors that have started sticking or no longer latch the way they used to Hairline cracks appearing in drywall, especially near door frames and window corners Floor tiles that sound hollow when you tap them or that have begun to crack along grout lines Unexplained wet or soggy patches in your yard that do not dry out normally after rain A water bill that has increased without any change in how much water your household uses Warm spots or damp areas on your slab floor, particularly noticeable on tile surfaces A faint sewage smell that you cannot locate no matter how thoroughly you clean Each of these on their own might have an innocent explanation. But when two or three of them are happening at the same time, especially in a home that sits on Beaumont Clay in the 77406 area, the connection to underground pipe movement is worth taking seriously. The sticking doors and drywall cracks deserve a specific explanation because homeowners often attribute these to normal settling. In some cases that is true. But when a pipe beneath your slab is leaking consistently, the moisture it releases into the soil beneath your foundation creates localized swelling that can cause sections of your slab to shift or heave unevenly. That movement is what pushes door frames slightly out of square and creates stress cracks in your walls. The plumbing and the structure of your home are more connected than most people realize. This Is a 77406 Problem That Needs a Local Solution It is worth saying directly that this is not a problem you will find equally distributed across every part of the Houston metro area. The specific composition of Beaumont Clay is particularly concentrated in the Fort Bend County region, and neighborhoods like The Grove and Pecan Grove sit squarely in that zone. General plumbing companies that work across a wide service area may not have deep familiarity with how Richmond’s specific geography affects underground pipe systems. A technician who primarily works in areas with sandier or more stable soil compositions may not immediately connect the plumbing symptoms to the soil movement patterns that are common here. This is one of the reasons that specialized underground pipe repair (visit our service page here) performed by a team that understands Richmond TX specifically is so important. The diagnosis, the repair approach, and the materials used all benefit from local knowledge about how these pipes behave in this particular environment over time. The Good News About All of This Understanding what is happening beneath your home

Did your HVAC technician show you photos after the visit? Learn why photo documentation matters, what it protects you from, and what professional service in Richmond TX should actually look like.
Uncategorized

Why Your HVAC Technician Should Take Photos During Service — What Richmond TX Homeowners Deserve to Know

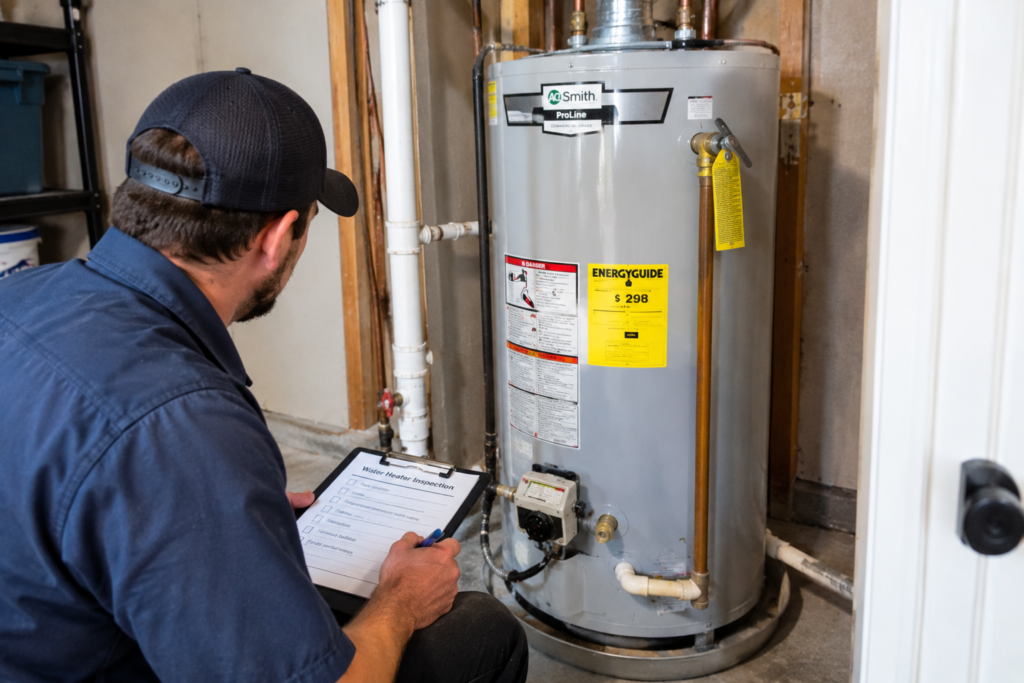
Most homeowners in Richmond TX have had a similar experience at some point. A technician shows up, disappears into the attic or crawls behind the unit, comes back out after twenty minutes, and tells you something is wrong. Maybe they show you a number on a gauge or mention a part that needs replacing. You nod along, trust that they know what they are talking about, write the check, and hope for the best. That is the standard experience. And for a long time, most homeowners did not know there was a better one. Recently, one of our customers named Julie shared her experience after a service visit with our technician Terry. What stood out to her was not just that the problem got fixed. It was that Terry took photos throughout the entire service call and walked her through every single one of them before leaving. She said it changed the way she understood her own home and made her feel genuinely respected as a customer. That feedback stayed with us because it pointed to something important. Photo documentation during an HVAC service visit is not a bonus feature or something only high-end service companies do. It is what professional, accountable service actually looks like. And most homeowners in Richmond TX have no idea they should be expecting it. This article is going to explain exactly why it matters, what a good technician should be capturing during a visit, and how those photos protect you in ways that go well beyond the service call itself. The Problem With “Just Trust Me” HVAC Service HVAC systems are tucked away in attics, closets, mechanical rooms, and tight utility spaces. Most homeowners never see the inside of their air handler, the condition of their coil, the state of their ductwork connections, or what is happening around their drain pan. You rely entirely on what a technician tells you because there is simply no practical way for you to verify it yourself. This creates an uncomfortable dynamic. You are making financial decisions, sometimes significant ones, based entirely on the word of someone you may have just met. Most technicians are honest and competent. But without documentation, there is no way to verify what was found, what was done, or why a particular repair or replacement was recommended. That is not a healthy position to be in as a homeowner. And a technician who understands real professional service knows this. Taking photos is one of the most straightforward ways to fix that imbalance entirely. View All Live Google Testimonials What Good Technicians Actually Capture During a Service Call Photo documentation is not about snapping a few random pictures to look thorough. A technician who does this properly knows exactly what to capture and why each image matters to you as the homeowner. The Condition of the System Before Any Work Begins Before a professional technician touches anything, they document the current state of your equipment. This includes the overall condition of the unit, any visible damage, rust, wear, or signs of previous repairs. This matters because it establishes a baseline. If a question ever arises later about whether something was already like that before they arrived, the photos answer it clearly. Any Specific Problem Areas Found During Inspection When a technician finds a refrigerant leak, a cracked heat exchanger, a failing capacitor, a clogged drain line, or dirty evaporator coils, a photo of that exact issue is worth more than any verbal explanation. You can see what they are describing. You can understand the severity visually rather than trying to interpret technical language you may have never heard before. And if you want a second opinion, you have something concrete to show another professional. Measurements and Readings in Context Refrigerant pressure readings, temperature differentials, electrical readings, these are numbers that mean very little to most homeowners without context. A good technician photographs their gauges and meters alongside the component being tested so you can see that the reading is real, current, and relevant to your specific system. It removes any ambiguity about where those numbers came from. The Work Completed After repairs are made, a new capacitor installed, coils cleaned, or a drain line flushed, photos of the completed work give you a clear record of what was done. This becomes your documentation of service history, which is genuinely useful for warranty purposes, future technician visits, and if you ever decide to sell your home. The Condition of the System After the Visit Closing photos that show your system cleaned, secured, and functioning properly complete the picture. You can see the before and after without having to climb into your attic or crouch behind your unit to check. How Photos Protect You as a Homeowner Beyond transparency, photo documentation serves some very practical protective functions that most homeowners have never considered. They Create Accountability When a technician knows they are documenting their work visually, it naturally raises the standard of that work. Every step is recorded. Every finding is captured. That level of accountability benefits both sides of the service relationship. You get confidence that the work was done properly, and the technician has a clear record that protects them from false claims as well. They Support Warranty Claims Many HVAC equipment warranties require documented proof of regular professional maintenance. If your system develops a problem and you need to make a warranty claim, having dated photos from each service visit strengthens your case significantly. Verbal assurances that your system was maintained do not hold up the way actual documentation does. They Help Future Technicians Serve You Better When a different technician visits your home in the future, either for a follow-up or because you called someone else for a second opinion, photos from previous visits give them real context. They can see what was found before, what was repaired, and what the condition of the system looked like at a specific point in time. That continuity of information leads to better diagnostics

Precision Ion HVAC System Installation
Uncategorized

Why Your 2-Story Richmond Home Has Hot Spots | Ion™ SmartSense™ Fixes It

You walk downstairs on a summer evening and the main floor feels perfectly comfortable. The thermostat reads exactly what you set it to. But then you head upstairs to check on the kids or get ready for bed and it feels like a completely different house. The hallway is warm, the bedrooms are stuffy, and no matter how low you push the thermostat, the upstairs never quite catches up. If this sounds familiar, you are not alone. This is one of the most common complaints we hear from homeowners across Richmond TX, and it happens in neighborhoods all over the area from Pecan Grove to Harvest Green. Two-story homes are beautiful and practical for families, but they come with a built-in cooling challenge that a standard AC system was never really designed to solve. The good news is that this problem has a real explanation and a real fix. Let us walk through what is actually happening inside your home and what it takes to make every room feel the way it should. Why 2-Story Homes in Richmond TX Struggle With Uneven Cooling Before anything else, it helps to understand why this happens in the first place. The issue is not usually a broken system or a failing thermostat. It is a combination of factors that work against each other, and in a climate like Richmond TX where summers are long, humid, and relentless, those factors get amplified significantly. Heat rises. This is simple physics and it plays out inside your home every single day. The warm air produced by cooking, sunlight through windows, electronics, and body heat naturally drifts upward. Your downstairs stays cooler partly because cool air sinks and settles at lower levels. Your upstairs collects everything that rises, which means it is fighting a much harder battle against the heat even before your AC system enters the picture. Then there is the attic factor. Most two-story homes in Richmond have an attic directly above the second floor, and during Texas summers that attic can reach temperatures of 140 to 160 degrees on a hot afternoon. That heat radiates downward through the ceiling into your upstairs rooms continuously, even at night, making the second floor work against a heat source that your AC system has to constantly overcome. Duct design plays a major role as well. Older homes, including many of the established properties in Pecan Grove, were built with duct systems designed for older, less efficient equipment. In many cases the ductwork was not properly sized or balanced for multi-story airflow distribution. Certain runs are too long, too narrow, or simply not positioned to push conditioned air all the way to the far end of the second floor before it loses pressure and temperature. Homes with high ceilings and open layouts, which are common in newer Richmond developments like Harvest Green, add another layer to this challenge. More vertical space means more air volume to condition, and open floor plans allow air to move in ways that a basic system was not designed to account for. Why Your Upstairs Feels Even Hotter at Night A lot of homeowners assume that once the sun goes down, the upstairs will naturally cool off. Unfortunately in Richmond, that is not how it works. The materials in your roof, attic insulation, and second-floor walls absorb heat all day long. Even after sunset, those materials continue releasing stored heat into your upstairs rooms for hours. It is called thermal mass, and it means your second floor is still fighting accumulated heat from the afternoon well into the evening when you are trying to sleep. At the same time, most standard AC systems cycle off once the downstairs thermostat reads the target temperature. By the time the system shuts off, the upstairs may still be several degrees warmer, and without continued airflow those rooms just sit in that warmth with nowhere for the heat to go. The Limits of Standard AC Systems in This Situation A standard single-stage AC system operates on a simple principle. It turns on at full power, cools until the thermostat is satisfied, and then shuts completely off. That cycle repeats throughout the day depending on how quickly the temperature climbs back up. The problem with this approach in a two-story home is that full blast cooling does not mean even cooling. The rooms closest to the supply vents and the air handler get conditioned air first and fastest. The rooms farther away, which in most two-story layouts means the upstairs bedrooms at the end of the hall, get whatever pressure and temperature is left after the air has traveled the full length of the duct system. By the time the thermostat downstairs says the house is cool enough and the system shuts off, the upstairs bedrooms may have only received a fraction of the conditioned air they actually needed. The system never ran long enough to balance things out, and the cycle starts all over again. This is why turning your thermostat down lower does not fix the problem. It just makes your downstairs colder while the upstairs stays stuffy and uncomfortable. How Variable-Speed Systems Actually Solve This Here is where things start to change meaningfully. A variable-speed system does not just switch on and off at full power. It runs continuously at different speeds depending on what the home actually needs at any given moment. During milder parts of the day it runs at a lower capacity, moving air steadily and consistently throughout the entire duct system. When demand increases it ramps up gradually rather than slamming on at full blast. This longer, steadier operation changes everything about how air reaches your rooms. Instead of a short aggressive burst that satisfies the nearest thermostat and then stops, air is being moved continuously at a pace that allows it to travel fully through the duct system and reach the rooms that need it most, including those upstairs bedrooms at the end of the hall. It also handles

Scroll to Top